[ad_1]
Screenshot by Pro Game Guides
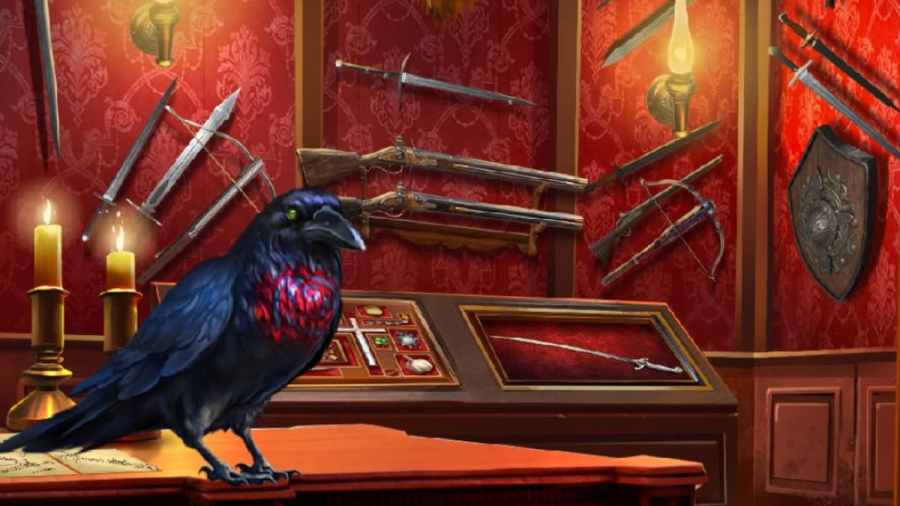
The Adventure Escape Mysteries games are packed full of hidden objects and puzzles to find, while you follow an exciting storyline. In this third part of our Haunted Hunt Walkthrough, Chapter 3 finds our shape-shifting hero Moira in an armory having just escaped a deadly trap by flying through the pipes in the form of a raven. What will befall her next?
Haunted Hunt Chapter 3 Walkthrough
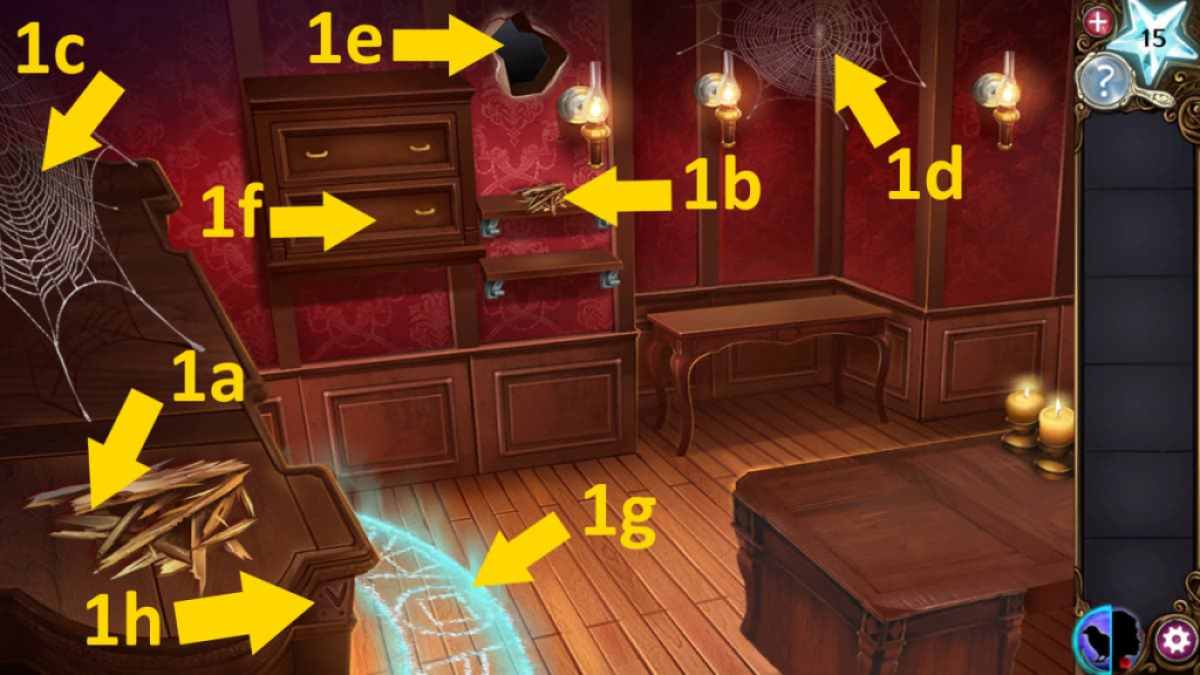
Immediately switch to raven form and collect the two sets of Wood Chips from the cabinet (1a) and the shelf (1b), plus two Cobwebs (1c and 1d). Click the hole in the wall (1e) to find a third set of Wood Chips and another Cobweb, then open the drawers (1f) to get a Screwdriver and a fourth pile of Wood Chips.
Related: Haunted Hunt Walkthrough, Chapter 2
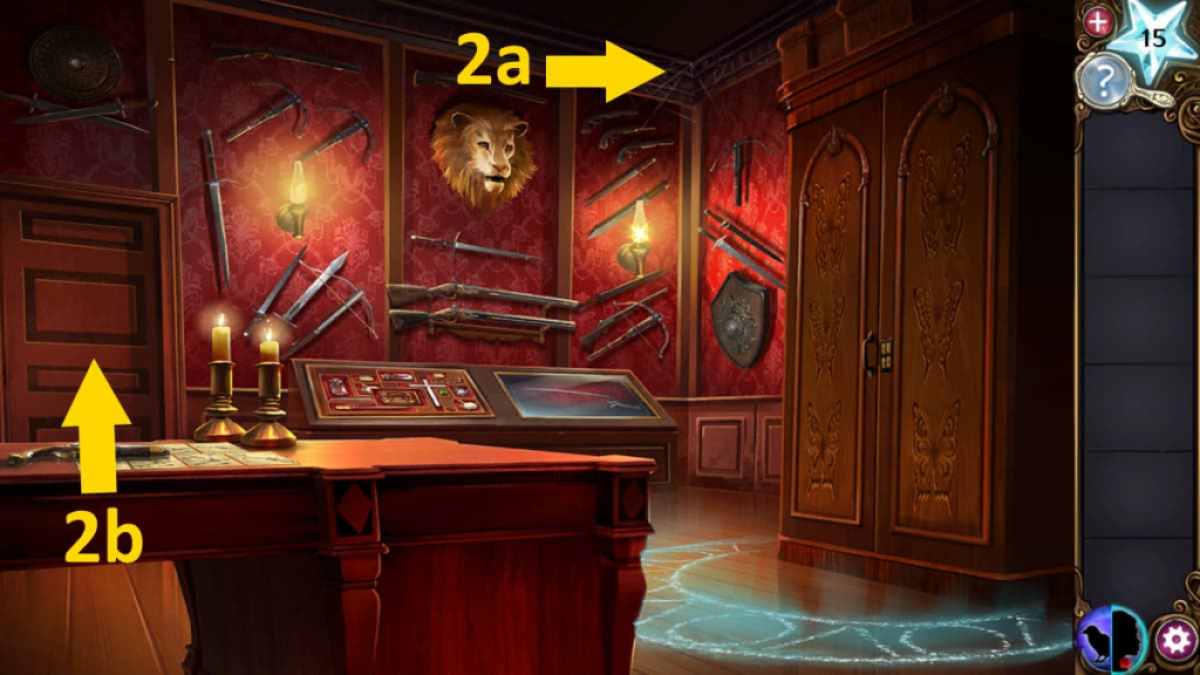
Back in human form, take another Cobweb (2a) then click the door back-left (2b) and enter the kitchen.

Switch to raven form and collect two more sets of Wood Chips (3a and 3b), and another Cobweb (3c), then use the screwdriver to get the Screw (3d).
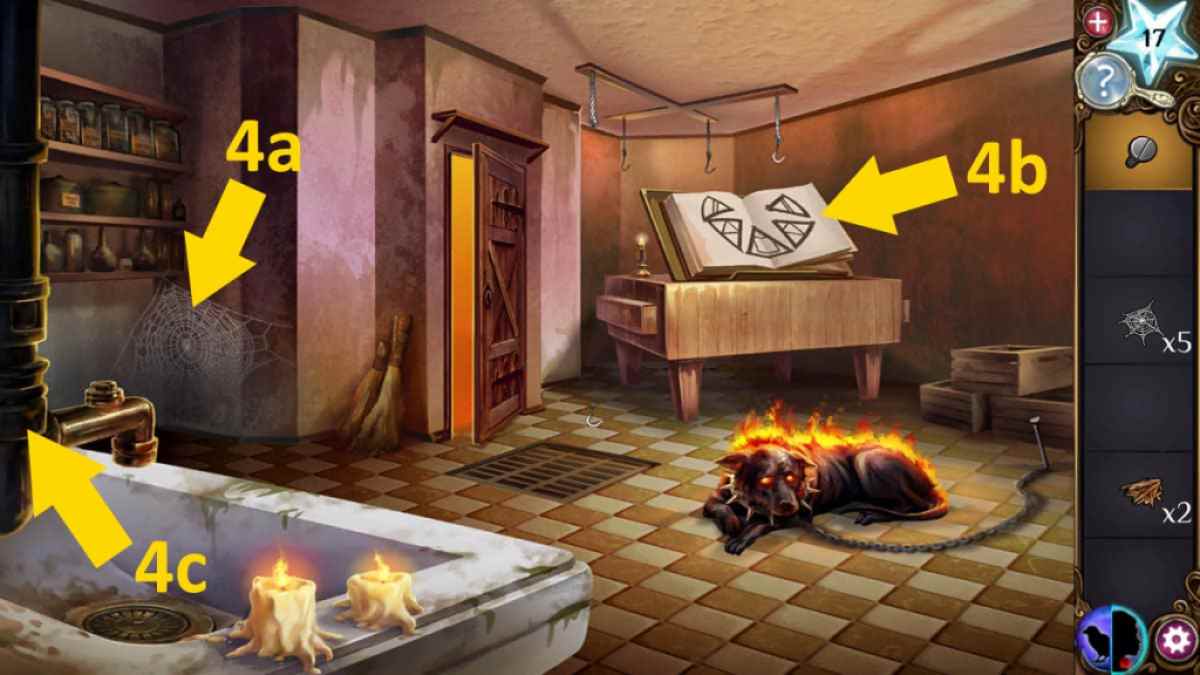
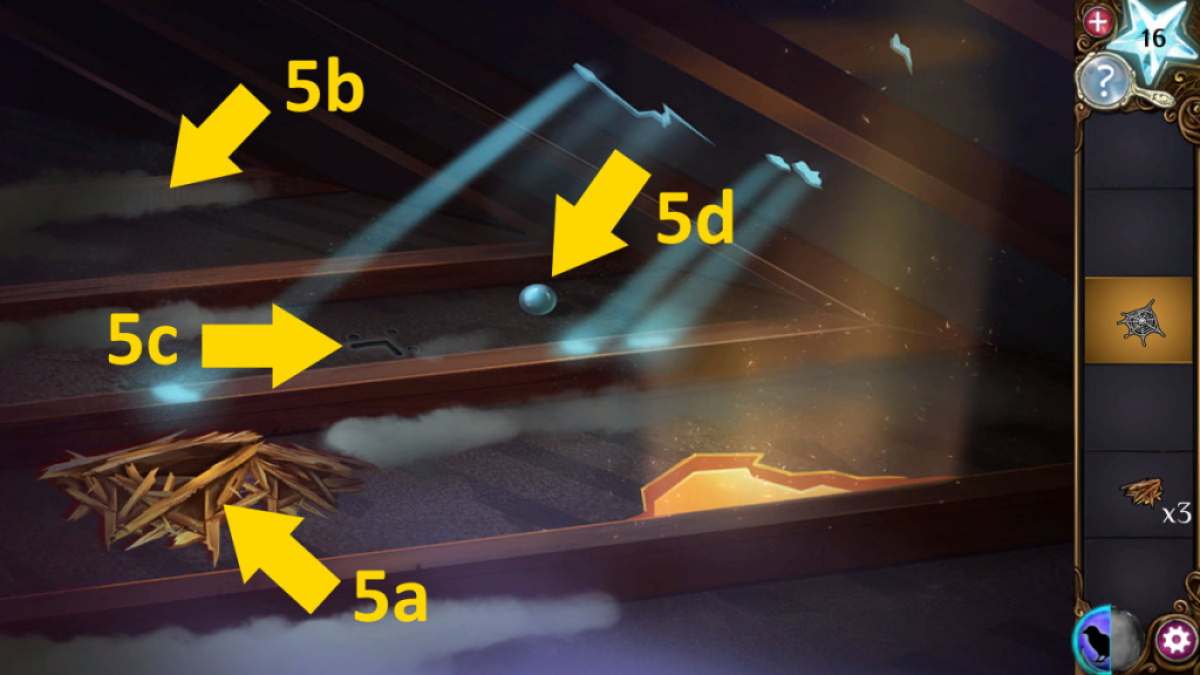
As a human, collect the Cobweb (4a) then go back to the armory. Become a raven and fly through the hole once more, adding all the wood chips and then the cobwebs to the nest (5a) to complete it. Pick up the Nest, and also the Salt you’ll find underneath it afterward. While here, click the beam at the back (5b) and note the pattern in the circles.
How to beat the Magic Barrier
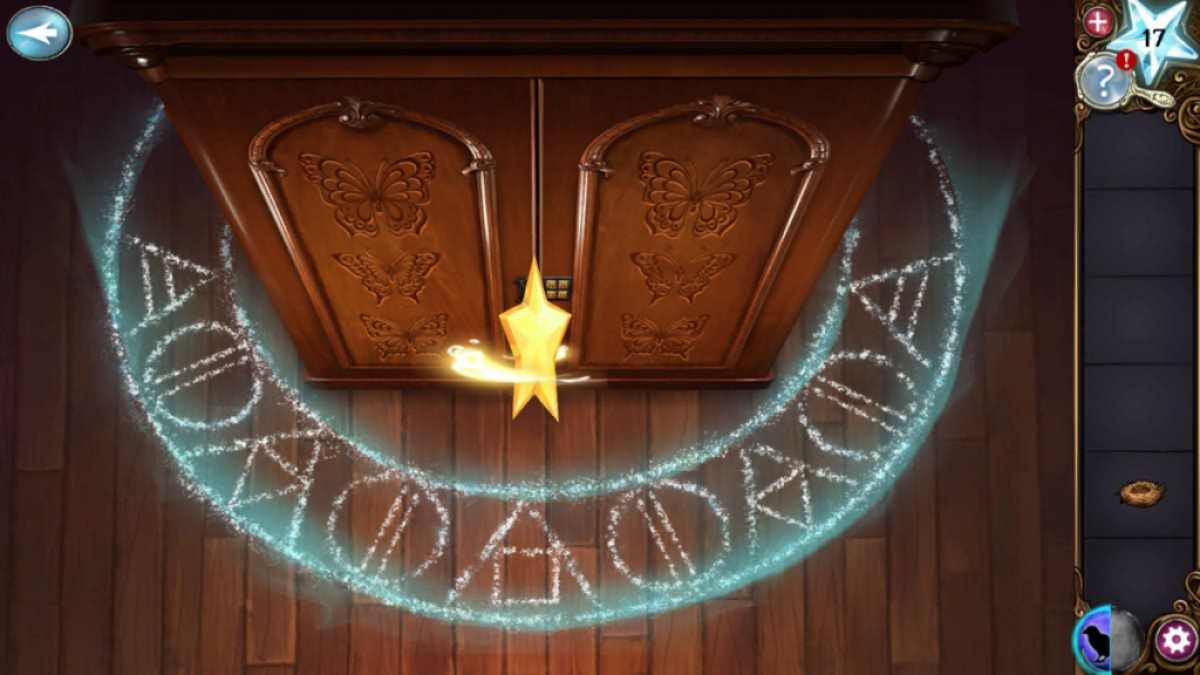
Back in the kitchen in human form, look at the pattern in the book (4b). Go to the armory, take raven form, and click the magical pattern (1g). Use the salt on the symbols, copying the two sets of symbols you have for the circles and the triangles. This will take the magic barrier down.
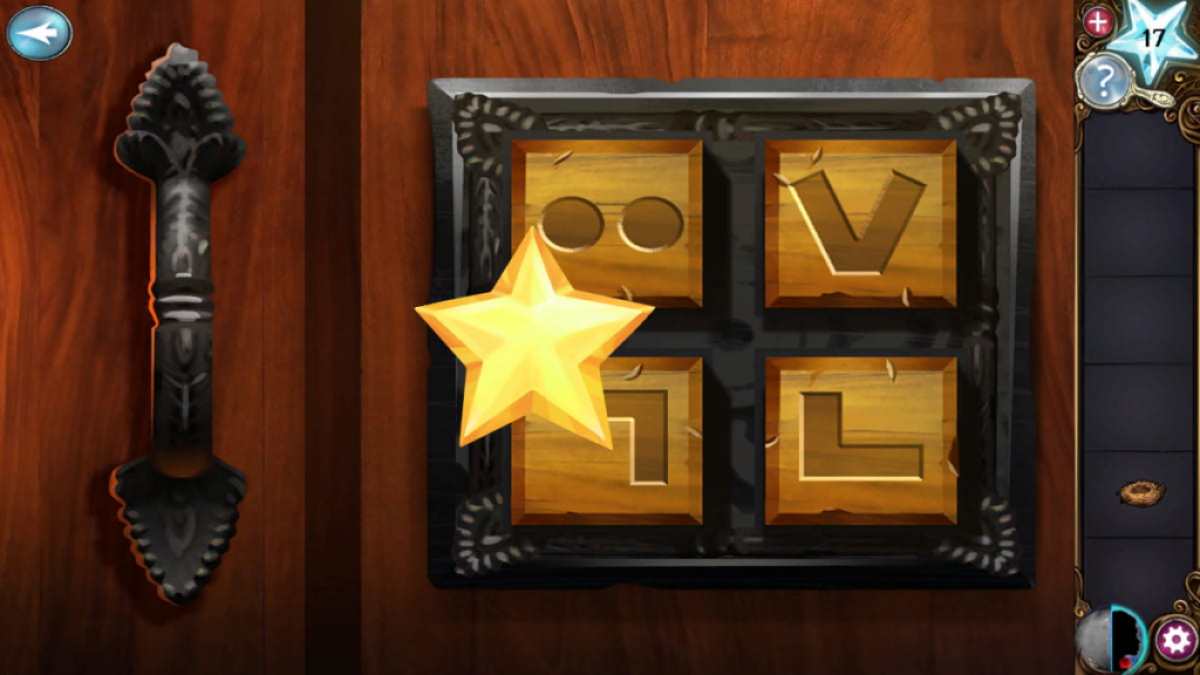
You now have access to the cabinet’s lock, but you need the combination. You’ll find the four answers in raven form, at locations marked on the images above:
- Top left: (3d)
- Top right: (1h)
- Bottom left: (5c)
- Bottom right: (3e)
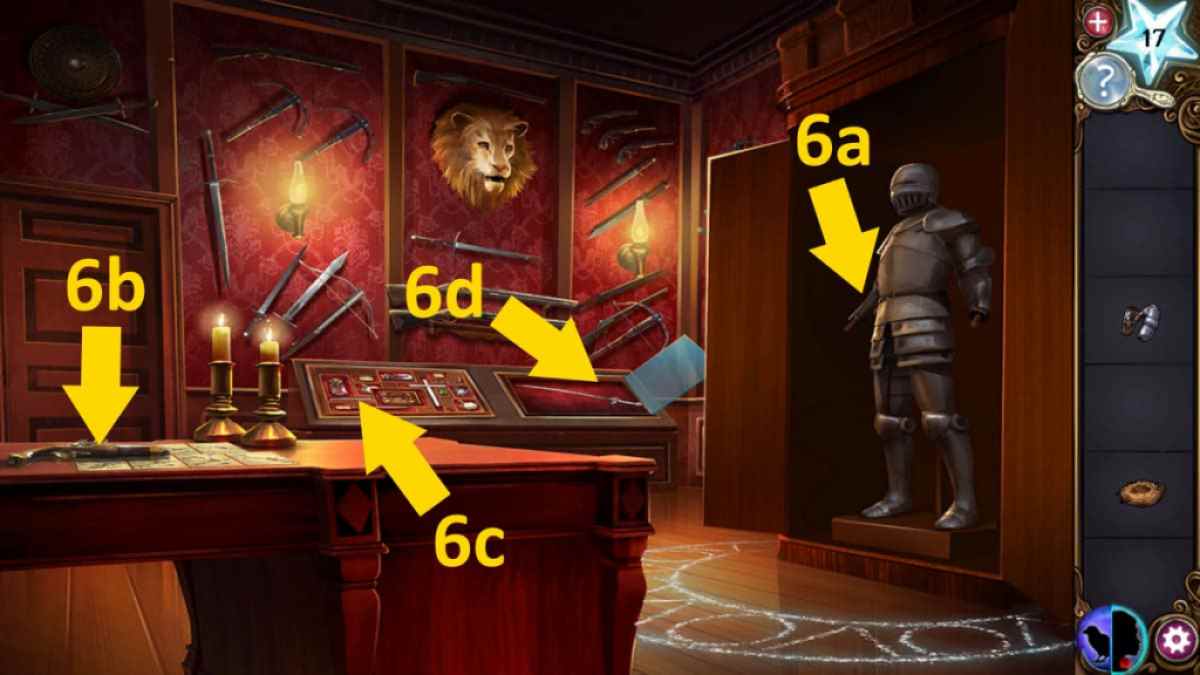
With the cabinet doors open, you can take the gauntlets from the armor suit (6a). Return to raven form, fly up into the hole, and use the gauntlets to retrieve the Silver Musket Ball (5d).
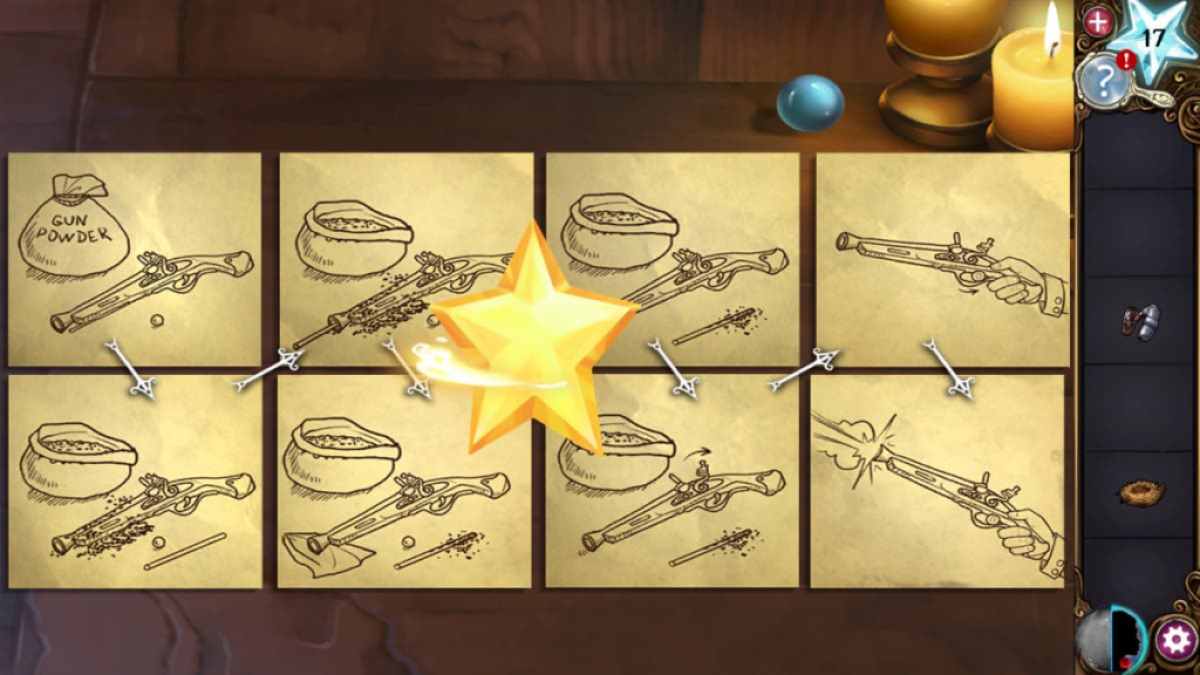
Click the musket on the table in the armory (6b) and add the silver musket ball, then rearrange the instruction cards until they make sense. Once complete, you’ll receive the Loaded Musket.
How to give the Hellhound some water
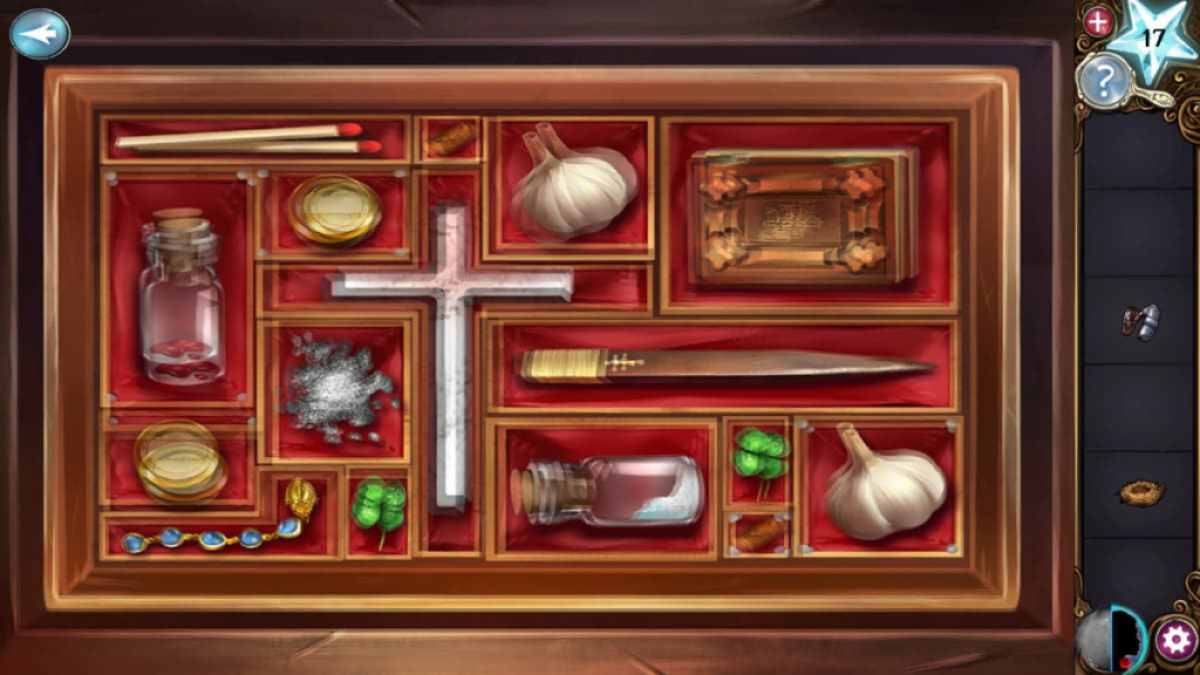
Go into the kitchen as a human and use the musket on the water pipe (4c). Click the mess now in the sink to get the Cork, then return to the armory and add the cork to the Hunter’s Kit (6c). You can now move the items in the kit around by dragging them. Once everything is perfectly organized, you’ll get the Broken Knife Handle.
Related: Echo Bay Murders – Chapter 1 Walkthrough
Go into the kitchen and put the bird’s nest in the sink, then use the handle on the tap to get running water and take the Nest Filled with Water. Give that to the Hellhound who will immediately perk up, but still needs to be set free.
How to complete Chapter 3 of Haunted Hunt
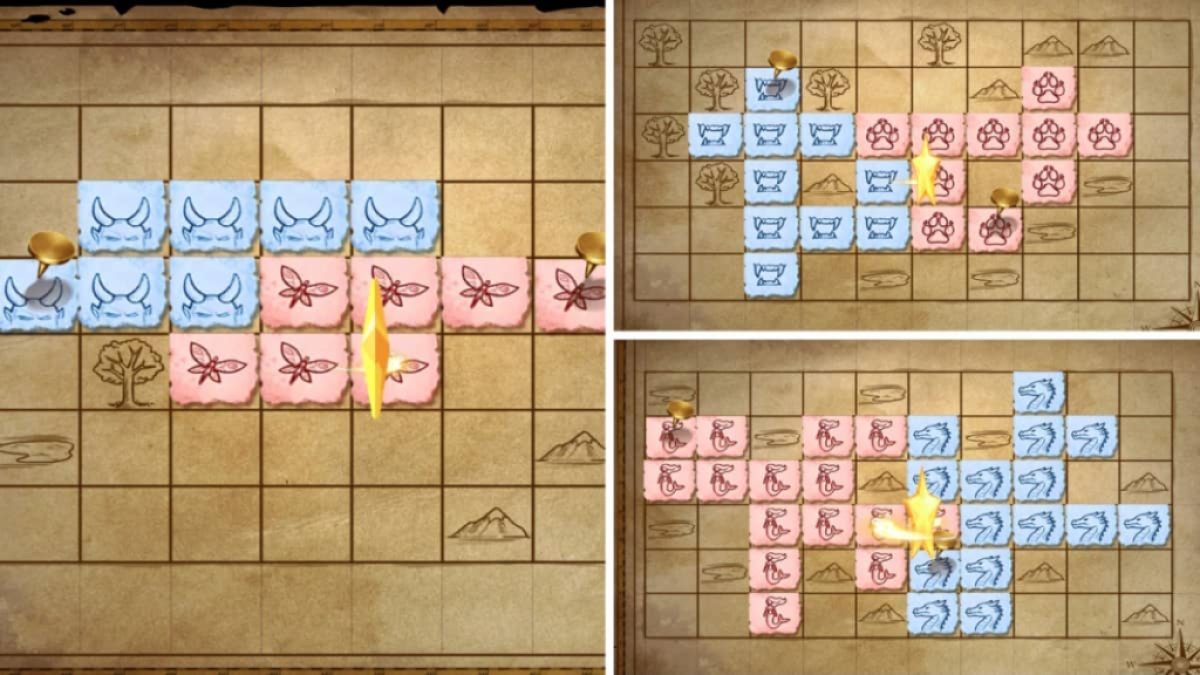
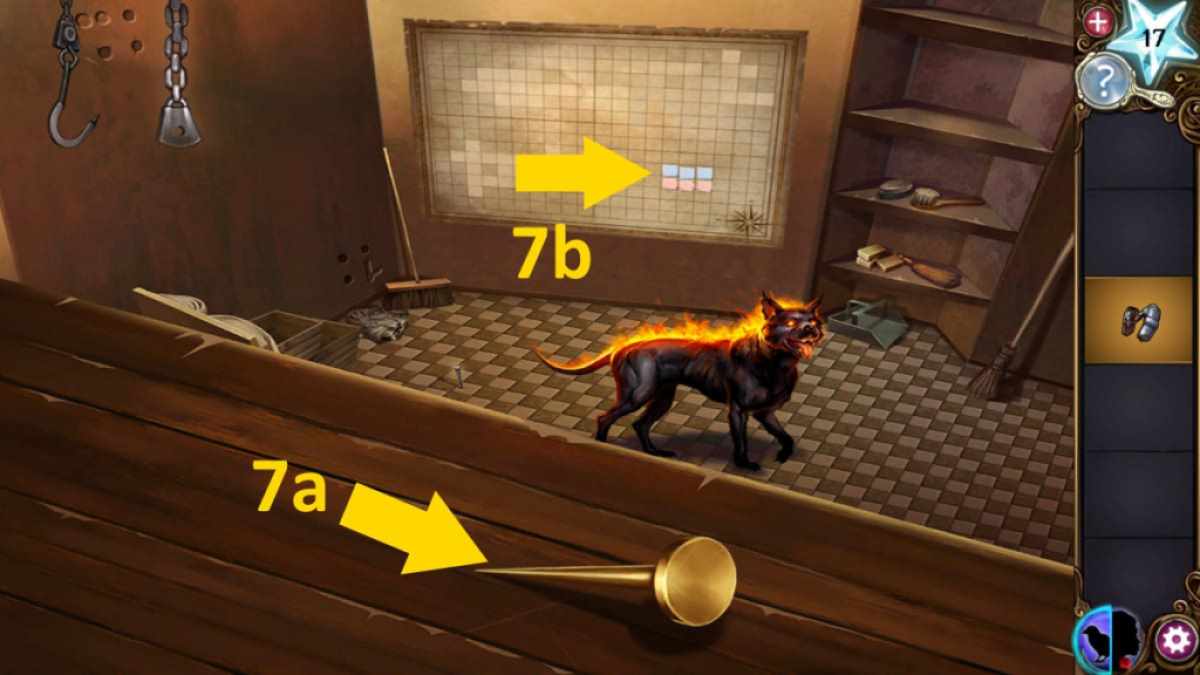
Back in raven form in the kitchen, you’ll find a pin that landed on the top shelf (7a) when the musket exploded. Pick it up, then click the board on the back wall (7b) and use the pin on it to start a map puzzle. Once complete, you’ll need to do it another two times to open a secret compartment in the wall. Still in Raven form, collect the Whetstone from the compartment.
Return to human form, go to the armory, and open the right side of the cabinet (6d). Use the screw to fix the sabre and the whetstone to sharpen it, then use the gauntlets to pick it up. Go back to the kitchen, and use the sabre on the chain to free the now happy hellhound (Beezle). When it stands, you’ll see a hole where it was laying. Click the hole and you’ll complete Chapter 3 of Haunted Hunt!
If you’re looking to continue the Haunted Hunt, you can find the full solution in our Haunted Hunt Walkthrough, Chapter 4 – Adventure Escape Mysteries. Or find more Adventure Escape Mysteries walkthroughs here at Pro Game Guides.
[ad_2]