[ad_1]
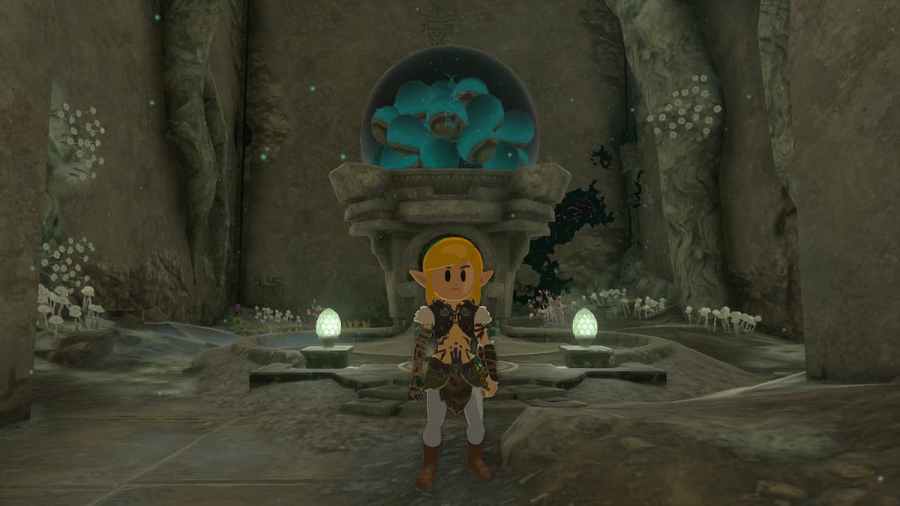
Screenshot by Pro Game Guides
Zonai Devices are one of my favorite additions in The Legend of Zelda: Tears of the Kingdom. Even if I am not the best builder, they add loads of creative solutions, and I’ve enjoyed seeing what other players do. However, to get Zonai Devices, I had to seek out Device Dispensers.
Where to find all Zonai Device Dispensers in Zelda Tears of the Kingdom
Zonai Device Dispensers – All Surface Locations
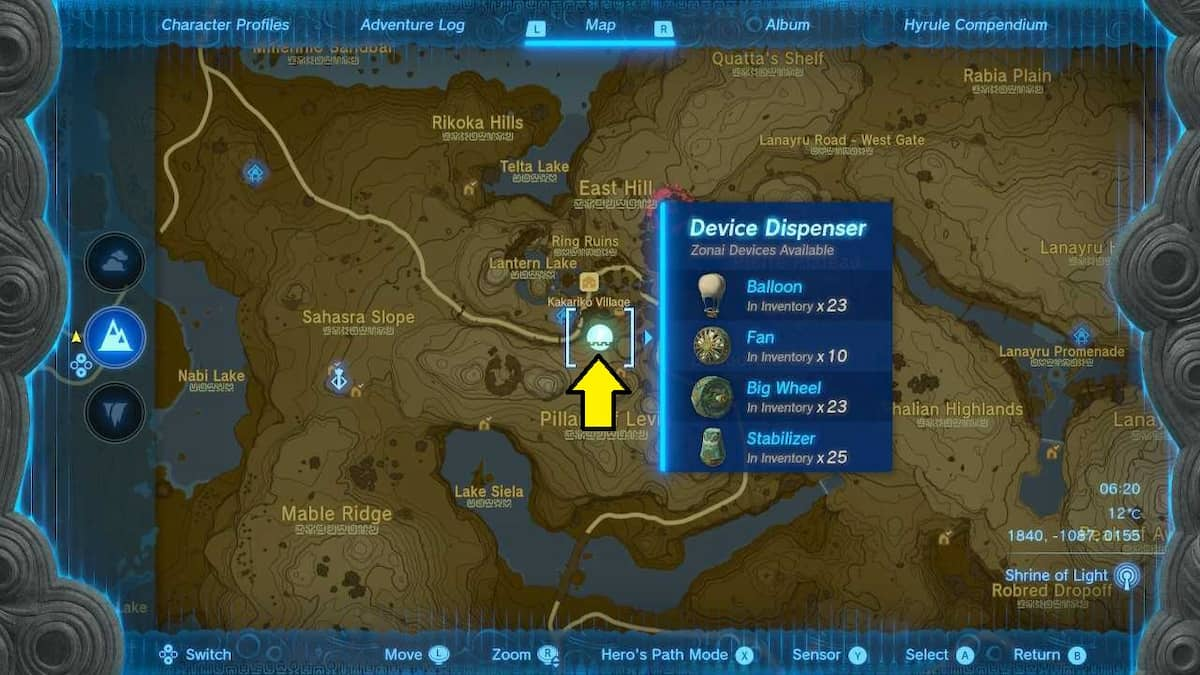
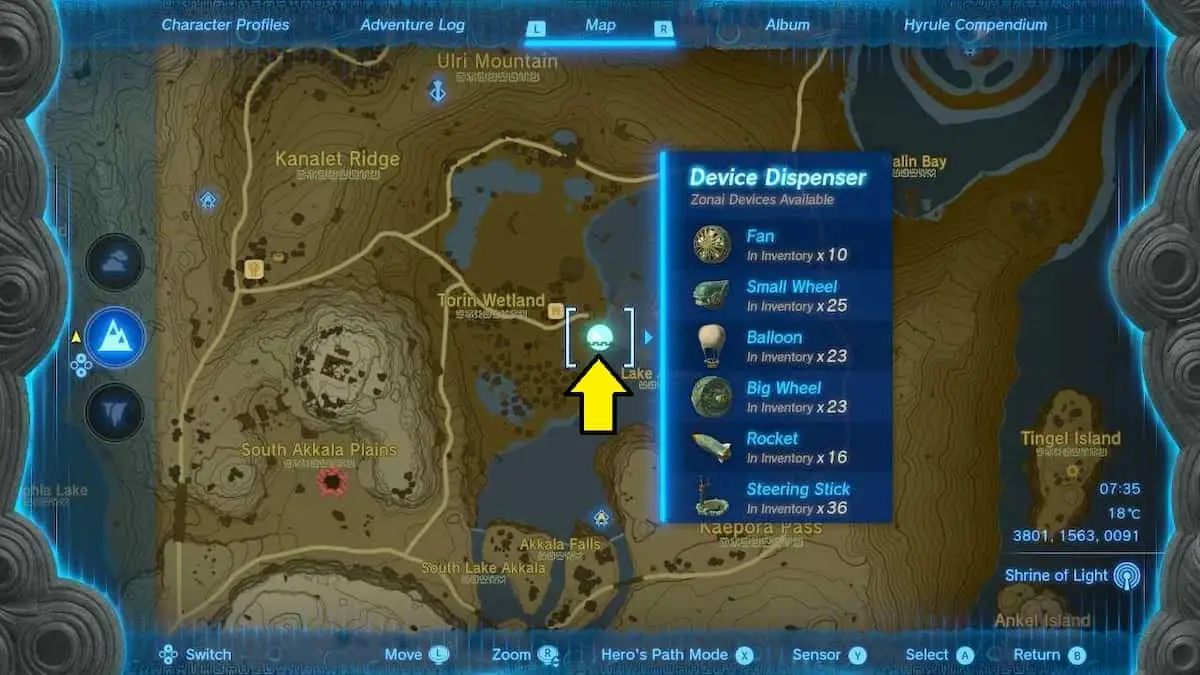
There are two Zonai Device Dispensers on the surface of Hyrule. These are found outside of Kakariko Village and at Tulen Wetlands. Use the Makasura Shrine to fast travel to Kakariko Village, and the Rasitakiwak Shrine or Jochi-ihiga Shrine to get to the Torin Wetlands Zonai Device Dispenser.
| Zonai Device Dispenser Coordinates | Map Location |
| Coordinates: 1840, -1087, 0155 -Balloon -Fan -Big Wheel -Stabilizer |
 |
| Coordinates: 3801, 1563, 0091 -Fan -Small Wheel -Balloon -Big Wheel -Rocket -Steering Stick |
 |
Zonai Device Dispensers – All Depths Locations
There are only two Zonai Device Dispensers in The Depths. These can be found at the Left Leg Depot and under Death Mountain. I recommend fast traveling to Muokuij Lightroot near the Great Abandoned Central Mine for the Left Leg Depot. For Death Mountain, the Mustis Lightroot is the closest fast travel point.
| Zonai Device Dispenser Coordinates | Map Location |
| Coordinates: 2186, 2634, -0962 -Big Wheel -Steering Stick -Portable Pot -Battery |
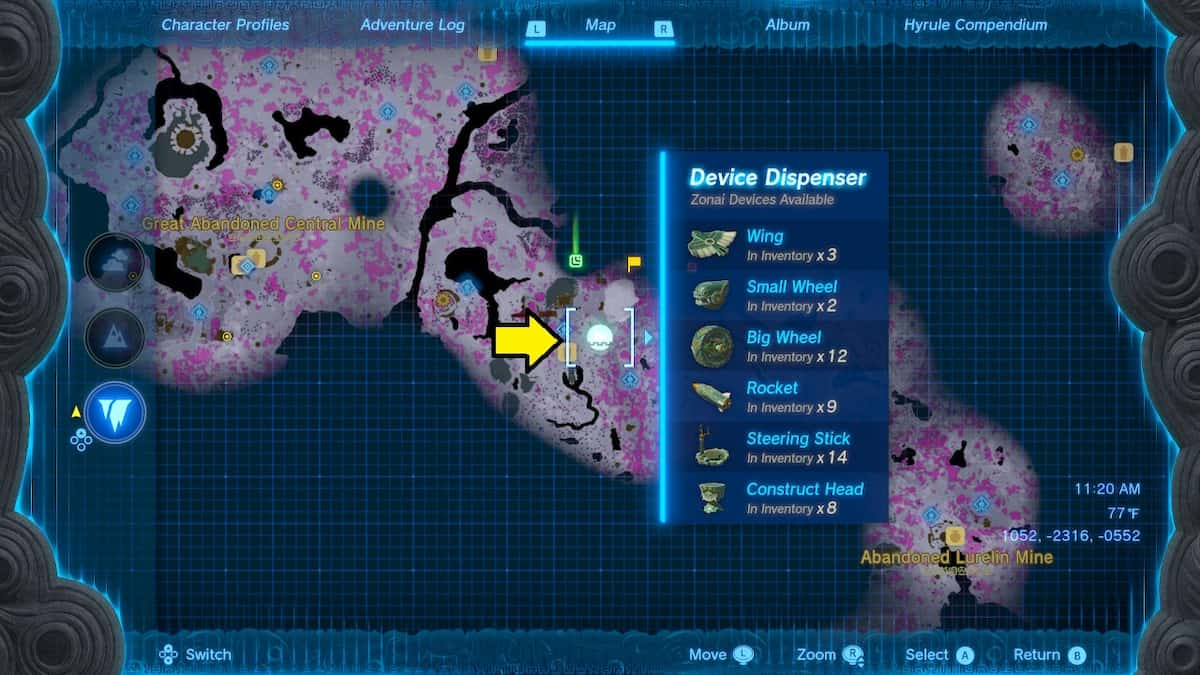 |
| Coordinates: 1052, -2318, -0552 -Wing -Small Wheel -Big Wheel -Rocket -Steering Stick |
 |
Related: All Lynel Locations in TOTK (Zelda Tears of the Kingdom)
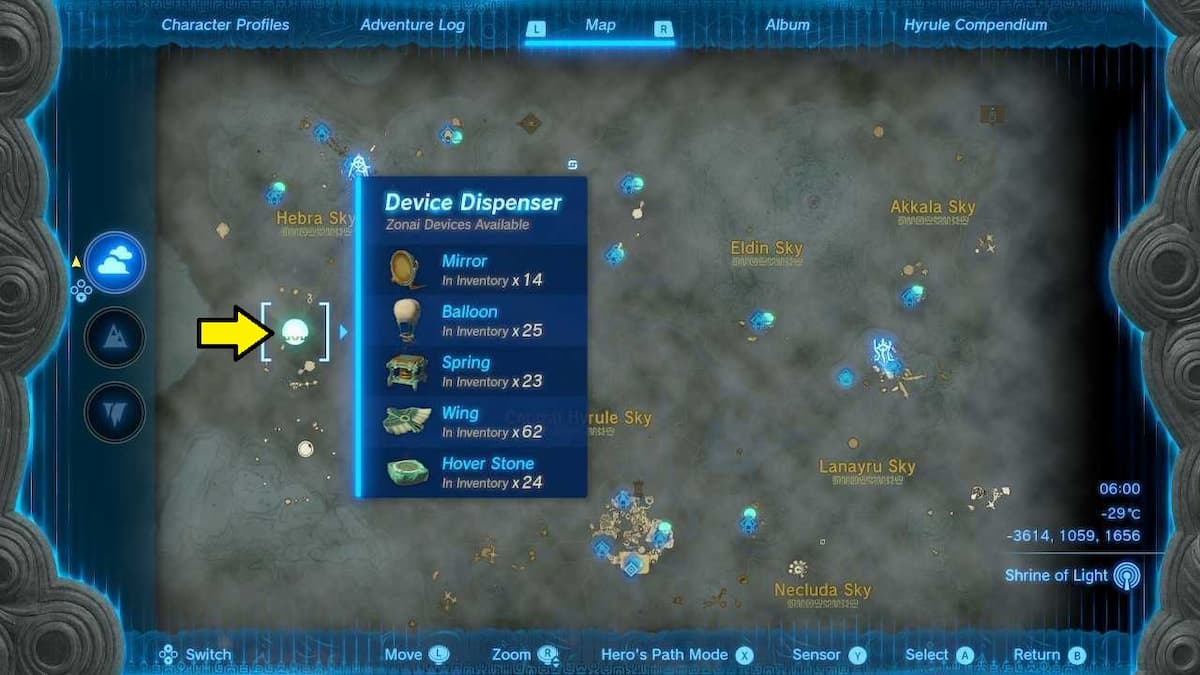
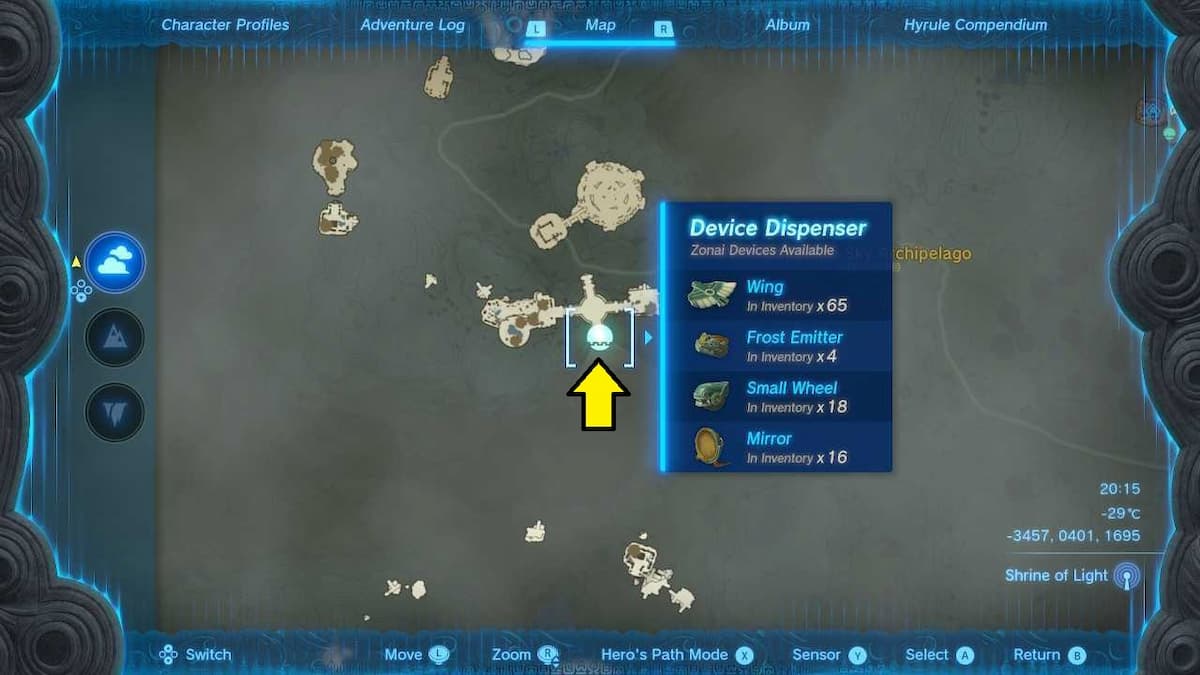
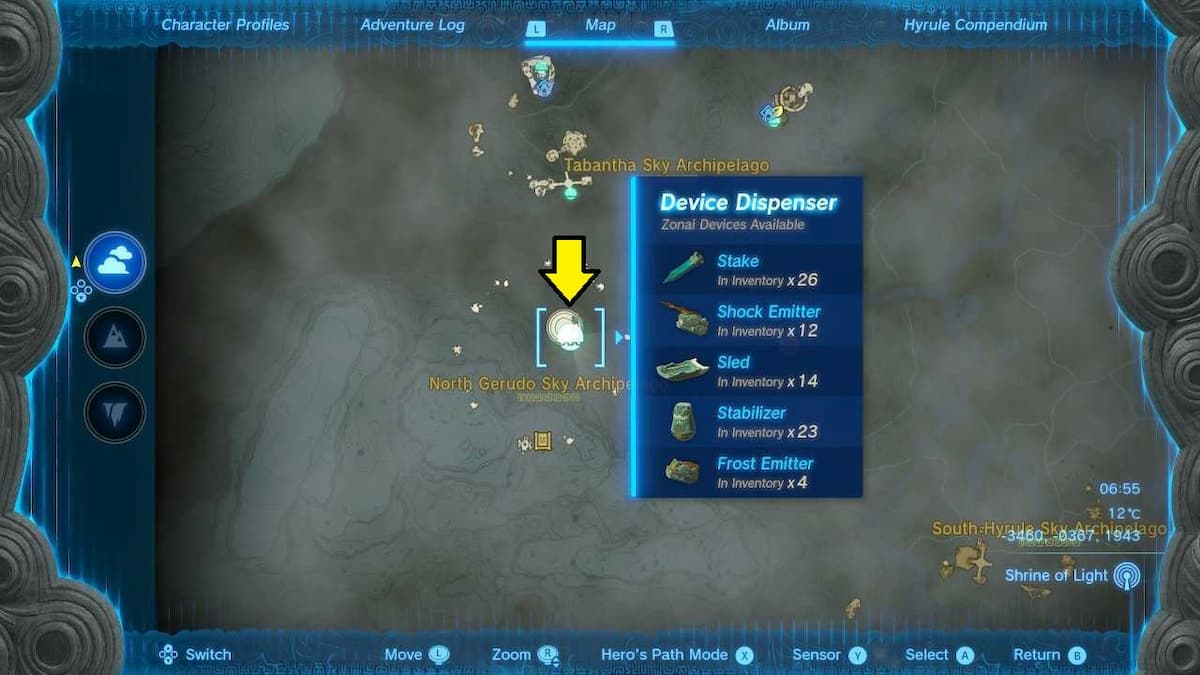
Zonai Device Dispensers – All Sky Locations
Zonai Device Dispensers in the sky are usually reachable by using the nearest Skyview Tower beneath. You can almost always find a Shrine near the Dispenser, which then becomes the best fast travel point. Here is a map of all Sky Island Zonai Device Dispensers and their locations.
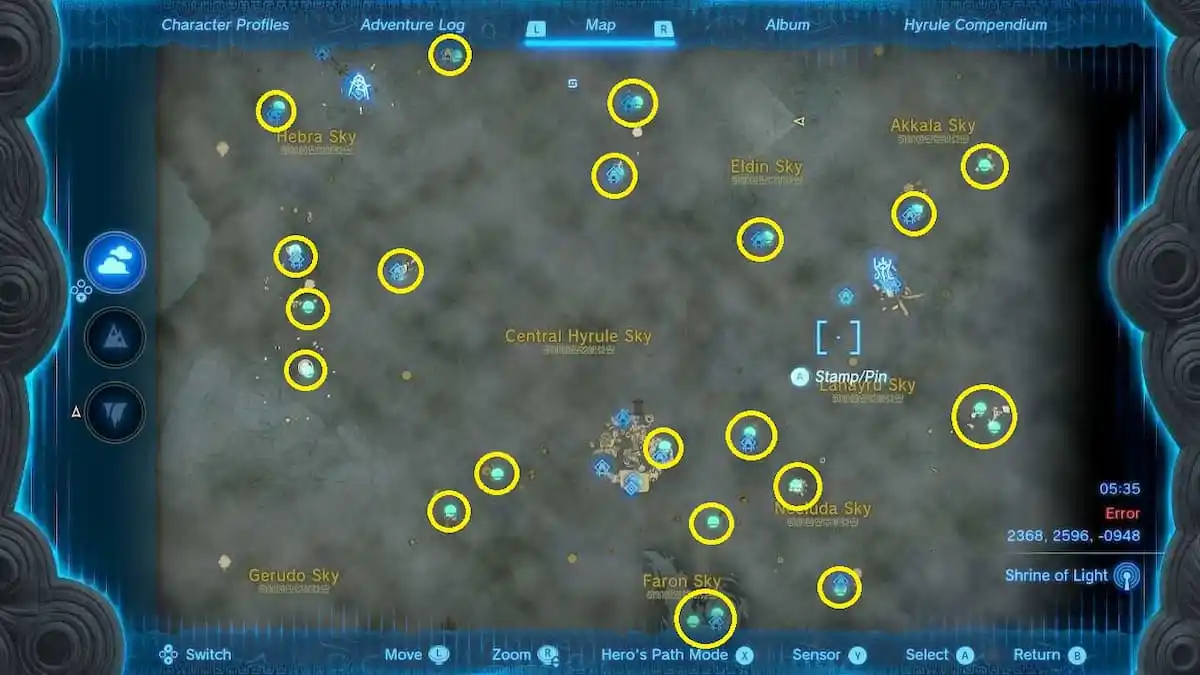
| Zonai Device Dispenser Coordinates | Map Location |
| Coordinates: -3614, 1059, 1656 -Mirror -Balloon -Spring -Wing -Hover Stone |
 |
| Coordinates: -3457, 0401, 1695 -Wing -Frost Emiter -Small Wheel -Mirror |
 |
| Coordinates: -3460, -0367, 1943 -Stake -Shock Emitter -Sled -Stabilizer -Frost Emitter |
 |
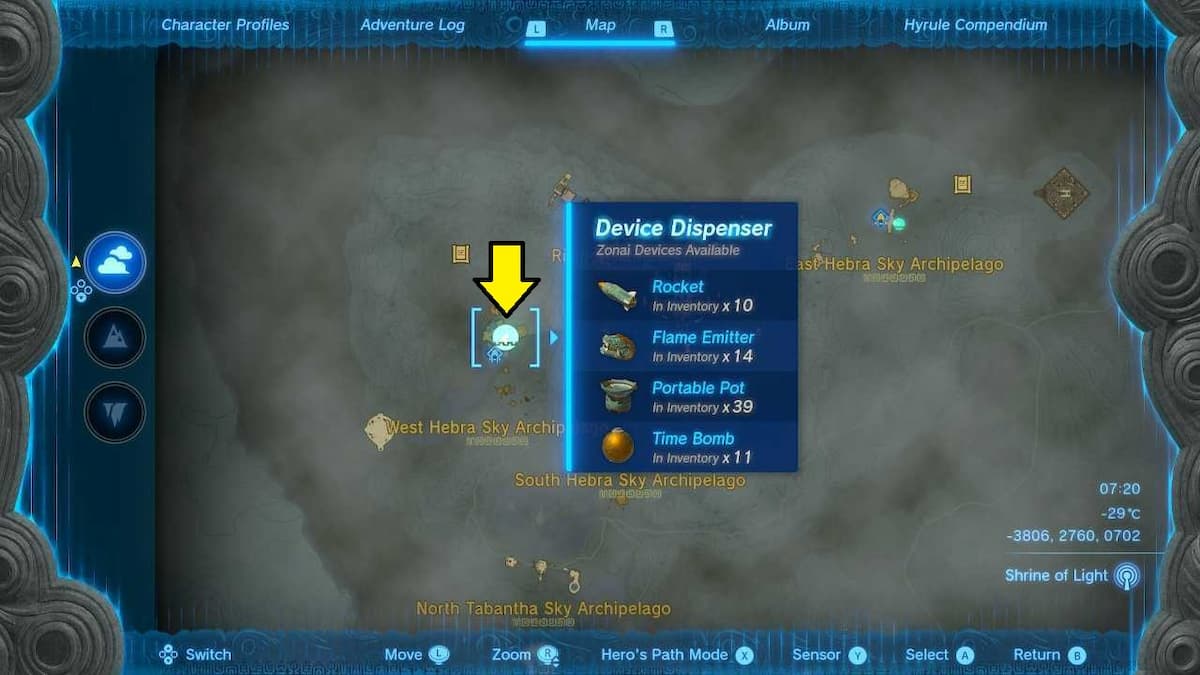
| Coordinates: -3806, 2760, 0702 -Rocket -Flame Emitter -Portable Pot -Time Bomb |
 |
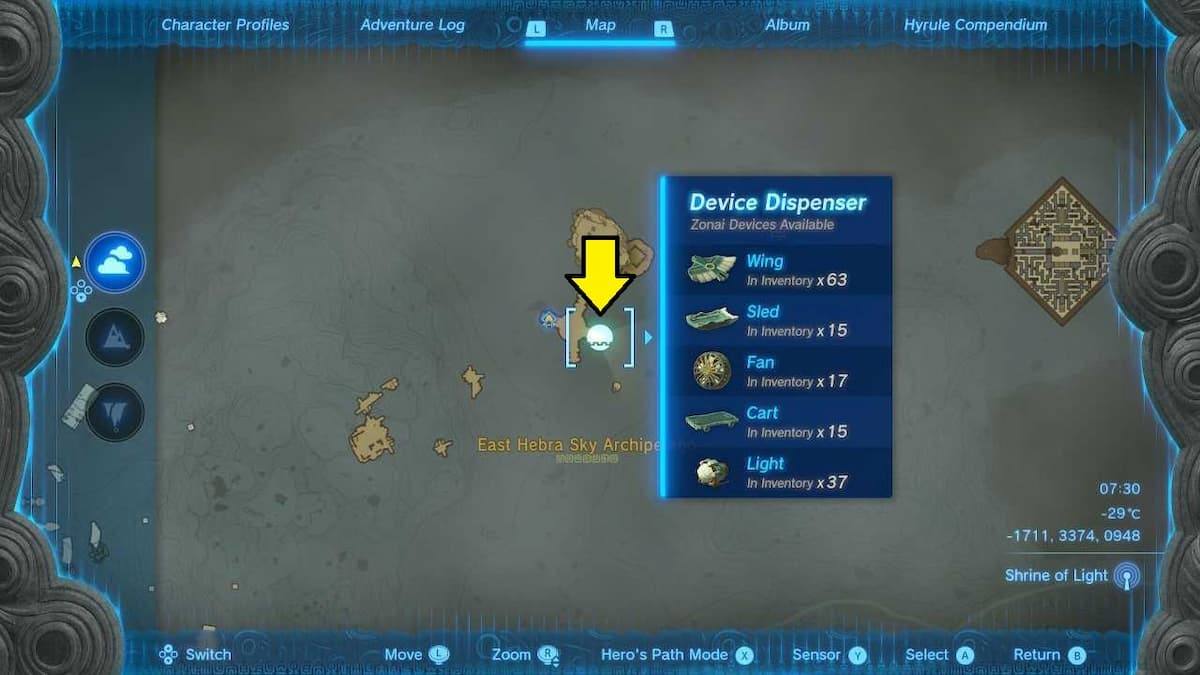
| Coordinates: -1711, 3374, 0948 -Wing -Sled -Fan -Cart -Light |
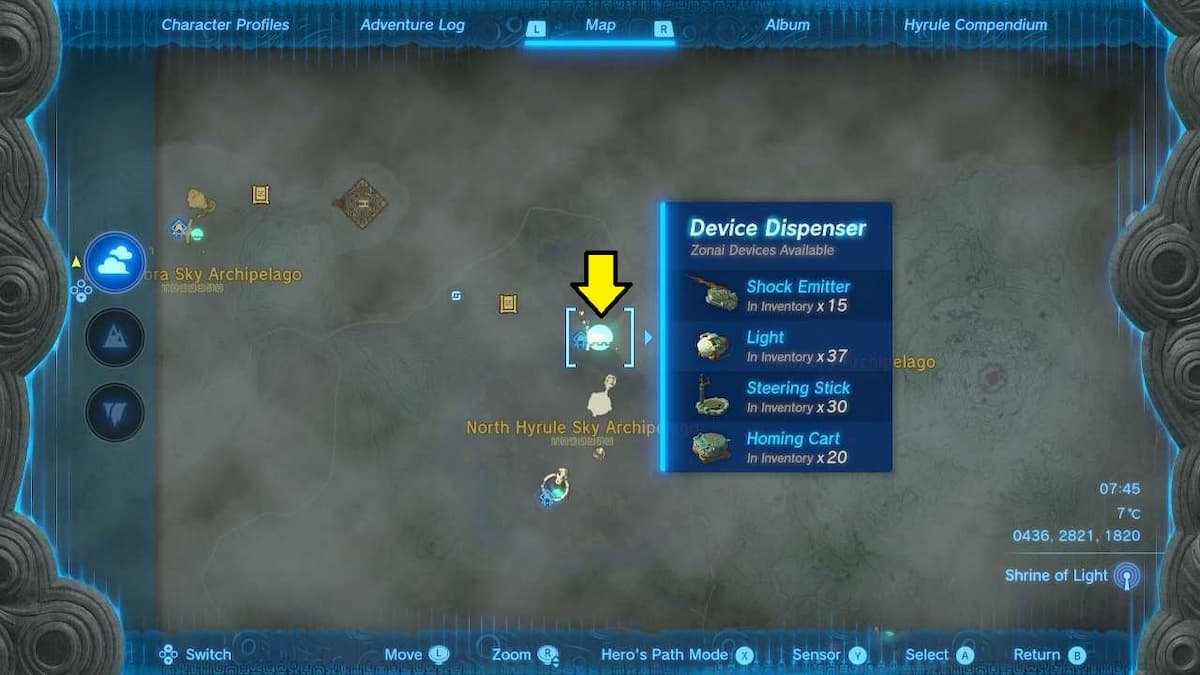 |
| Coordinates: 0436, 2821, 1820 -Shock Emitter -Light -Steering Stick -Homing Cart |
 |
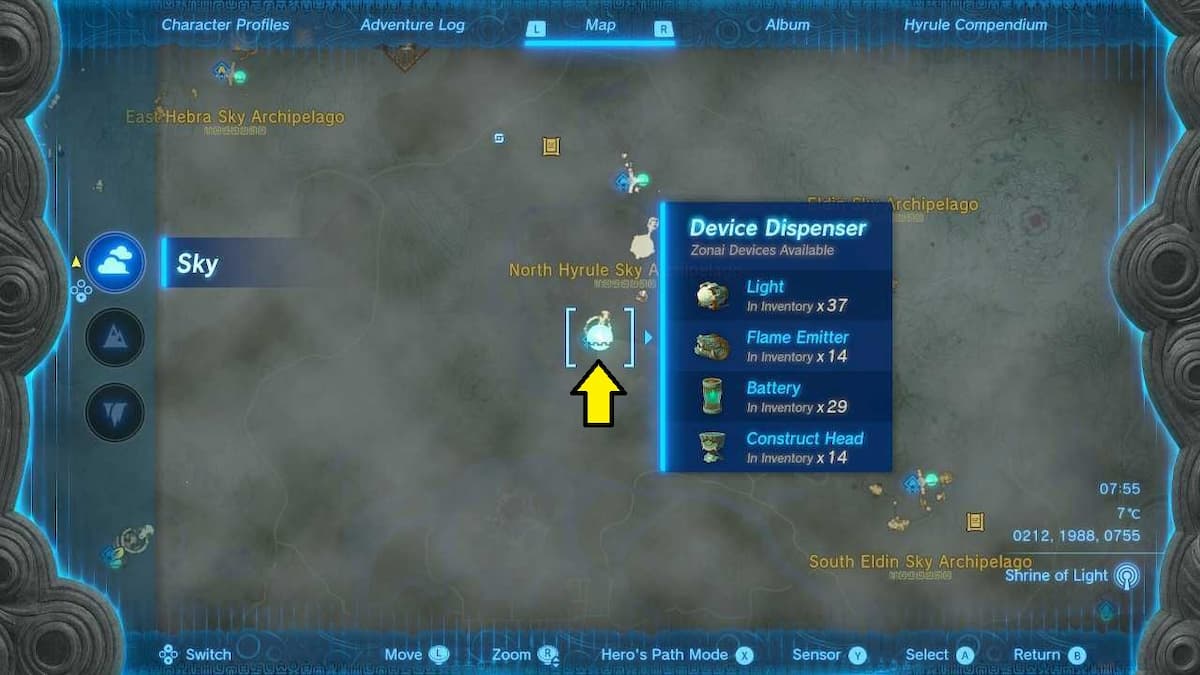
| Coordinates: 0212, 1988, 0755 -Light -Flame Emitter -Battery -Construct Head |
 |
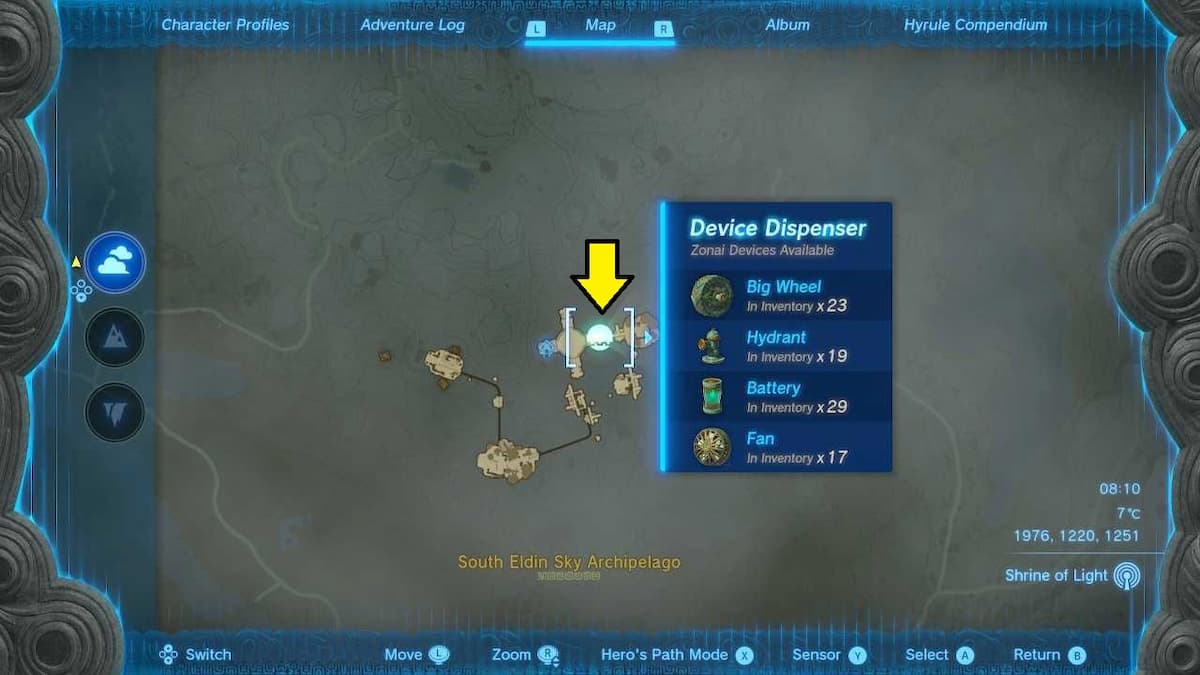
| Coordinates: 1976, 1220, 1251 -Big Wheel -Hydrant -Battery -Fan |
 |
| Coordinates: 3436, 0640, 1317 -Fan -Hover Stone -Wing -Battery -Stabilizer |
 |
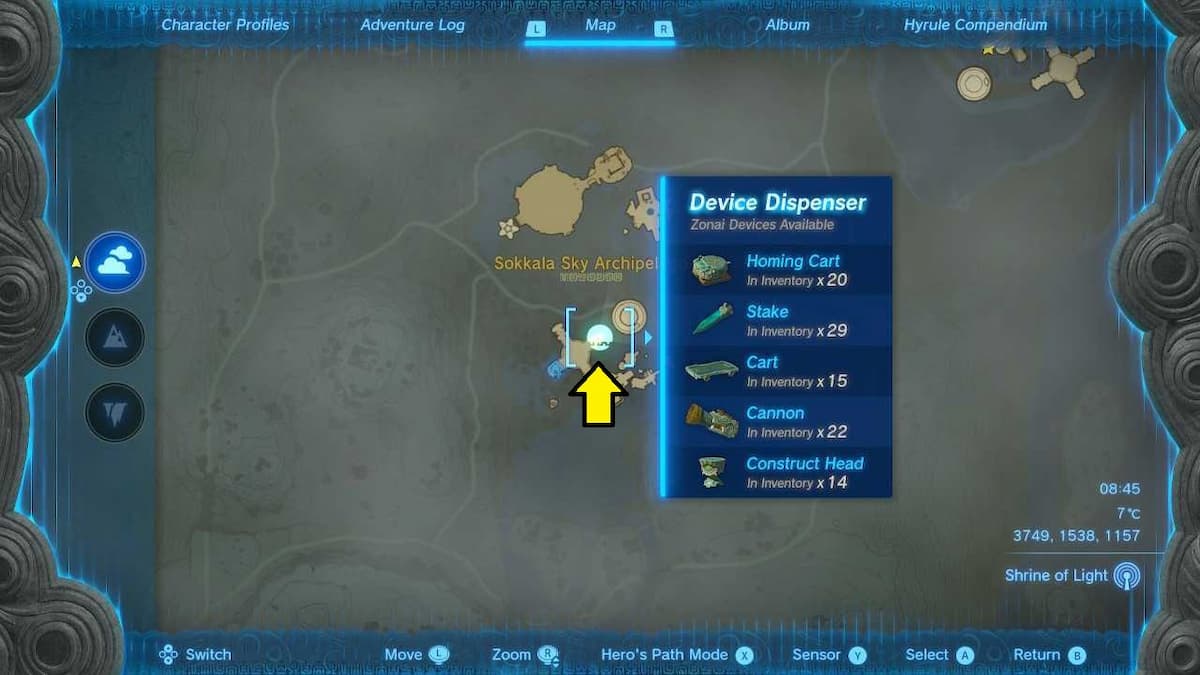
| Coordinates: 3749, 1538, 1157 -Homing Cart -Stake -Cart -Cannon -Construct Head |
 |
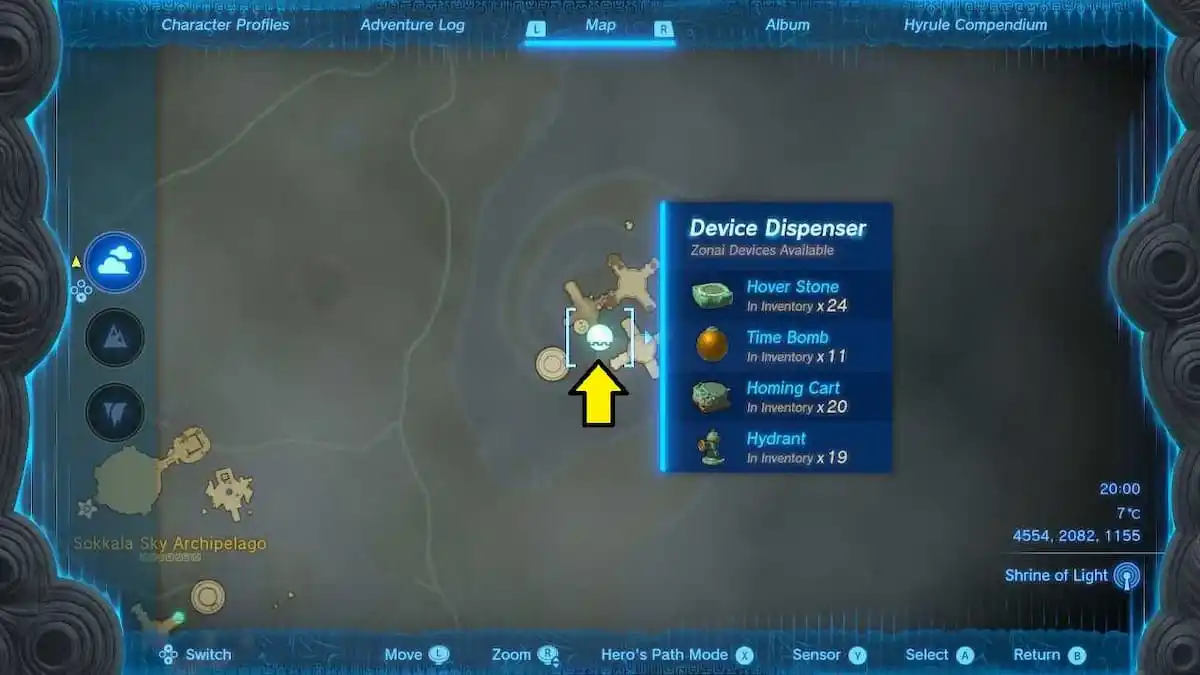
| Coordinates: 4554, 2082, 1155 -Hover Stone -Time Bomb -Homing Cart -Hydrant |
 |
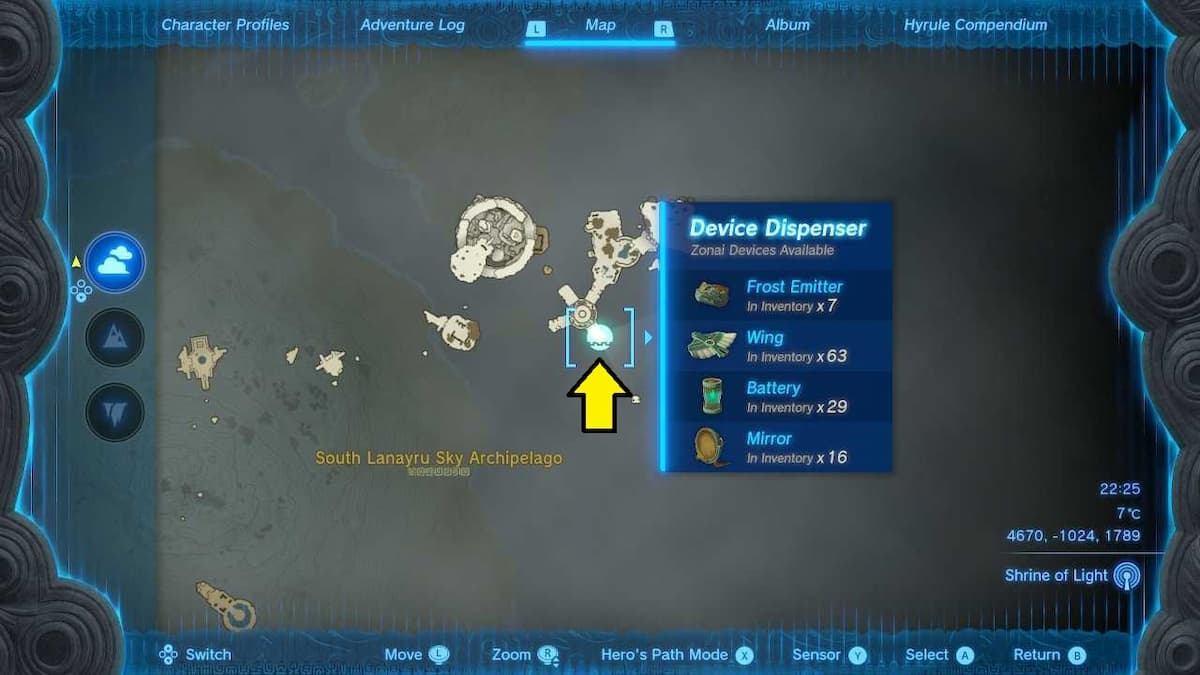
| Coordinates: 4670, -1024, 1789 -Frost Emitter -Wing -Battery -Mirror |
 |
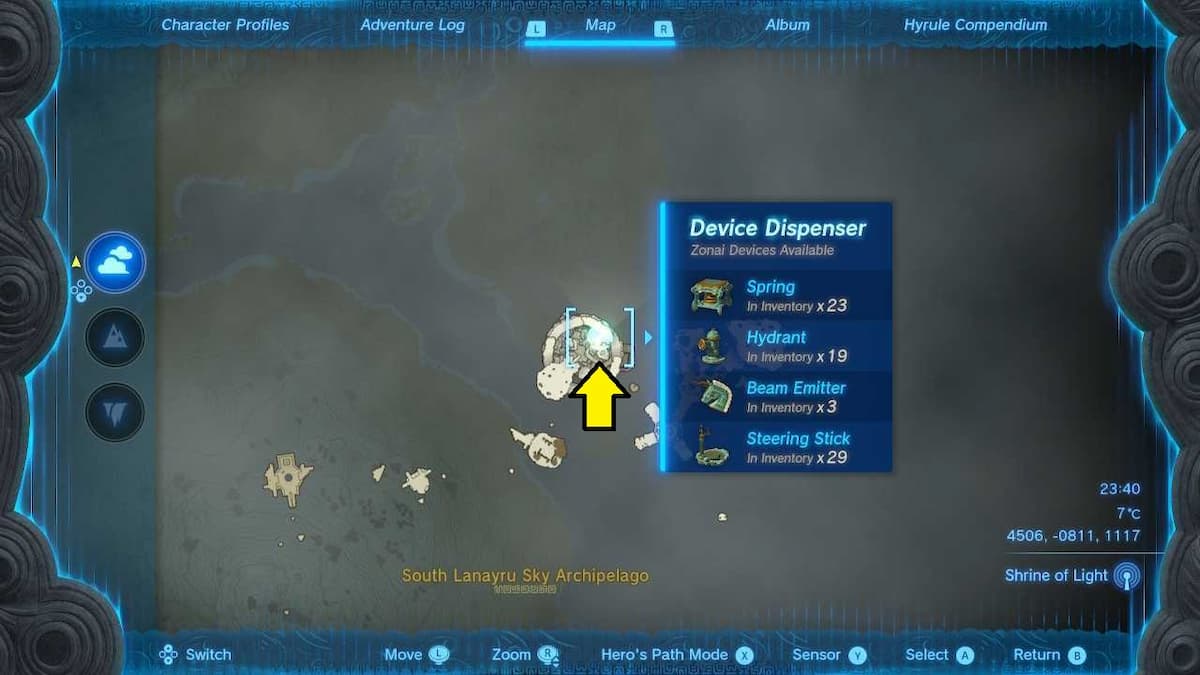
| Coordinates: 4506, -0811, 1117 -Spring -Hydrant -Beam Emitter -Steering Stick |
 |
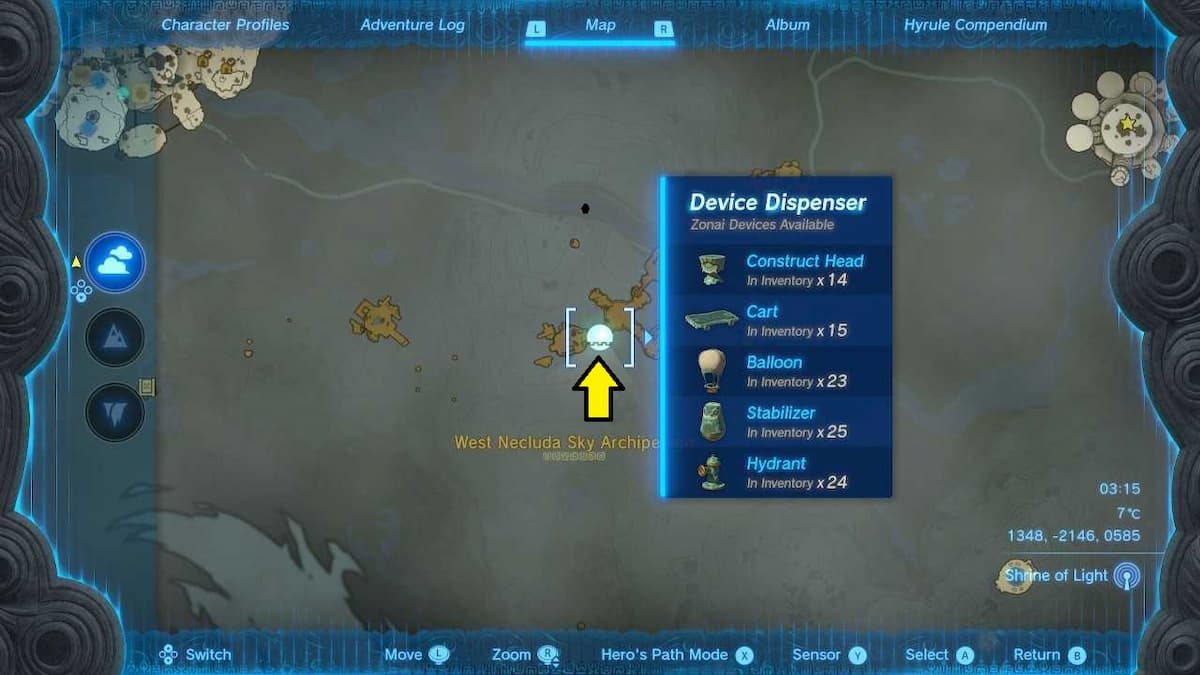
| Coordinates: 1348, -2146, 0585 -Construct Head -Cart -Balloon -Stabilizer -Hydrant |
 |
| Coordinates: 2323, -1721, 1485 -Homing Cart -Beam Emitter -Flame Emitter -Frost Emitter -Time Bomb |
 |
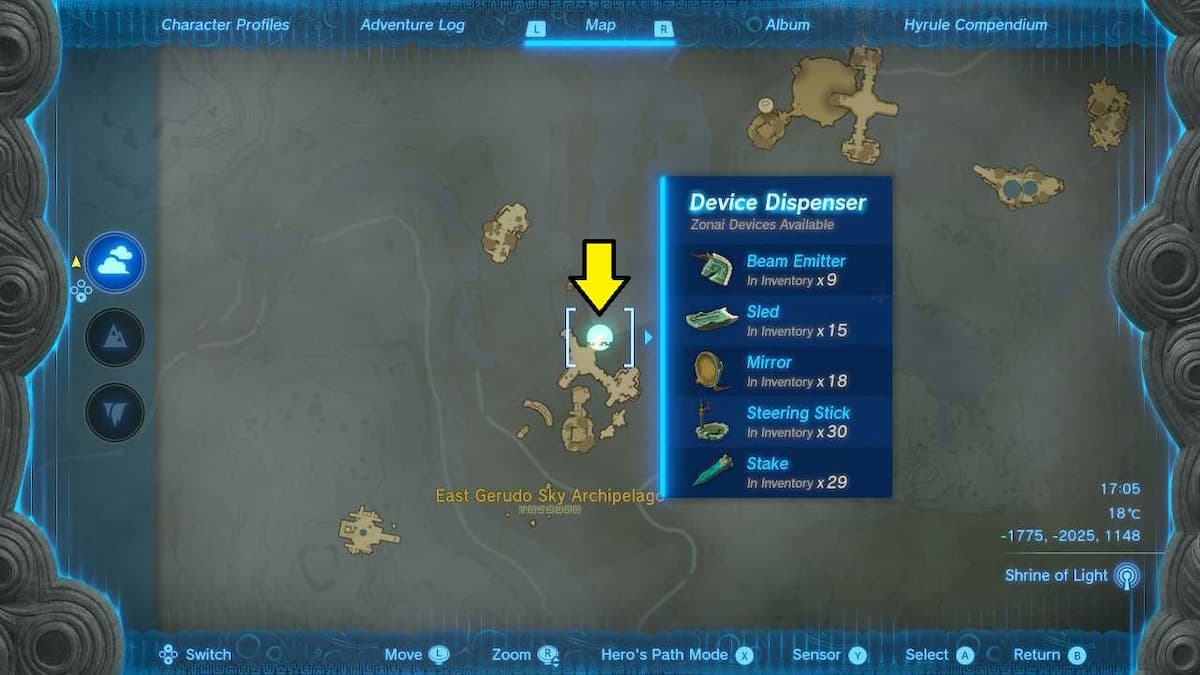
| Coordinates: -1775, -2025, 1148 -Beam Emitter -Sled -Mirror -Steering Stick -Stake |
 |
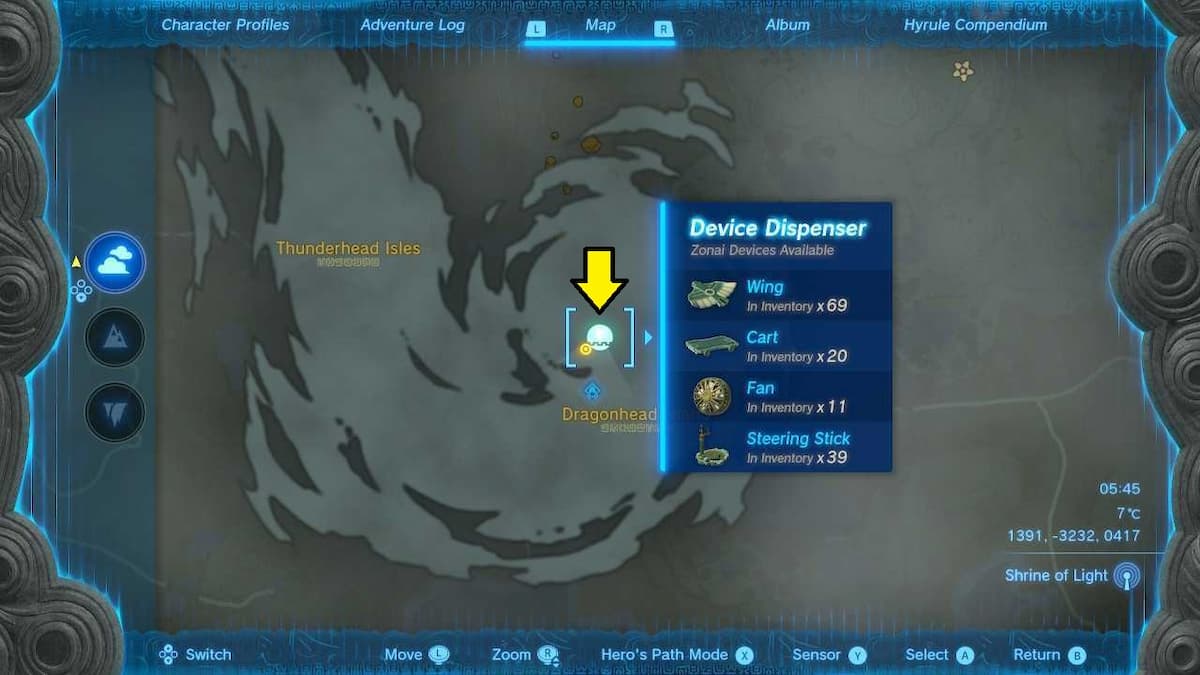
| Coordinates: 1391, -3232, 0417 -Wing -Cart -Fan -Steering Stick |
 |
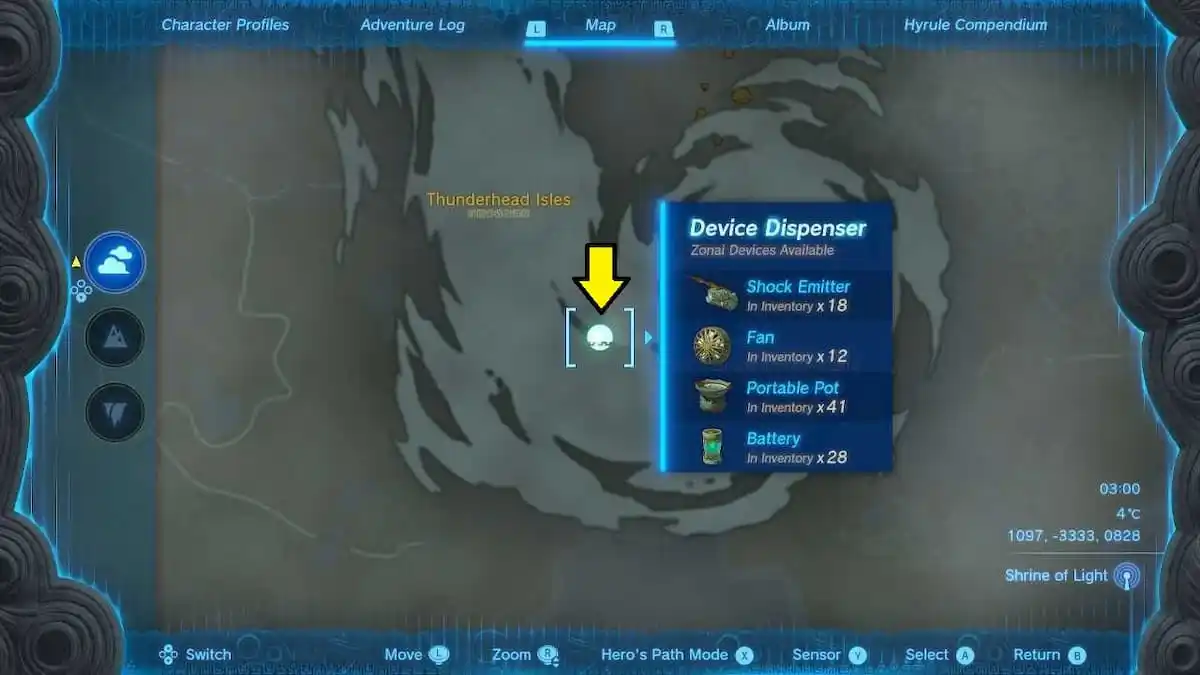
| Coordinates: 1097, -3333, 0828 -Shock Emitter -Fan -Portable Pot -Battery |
 |
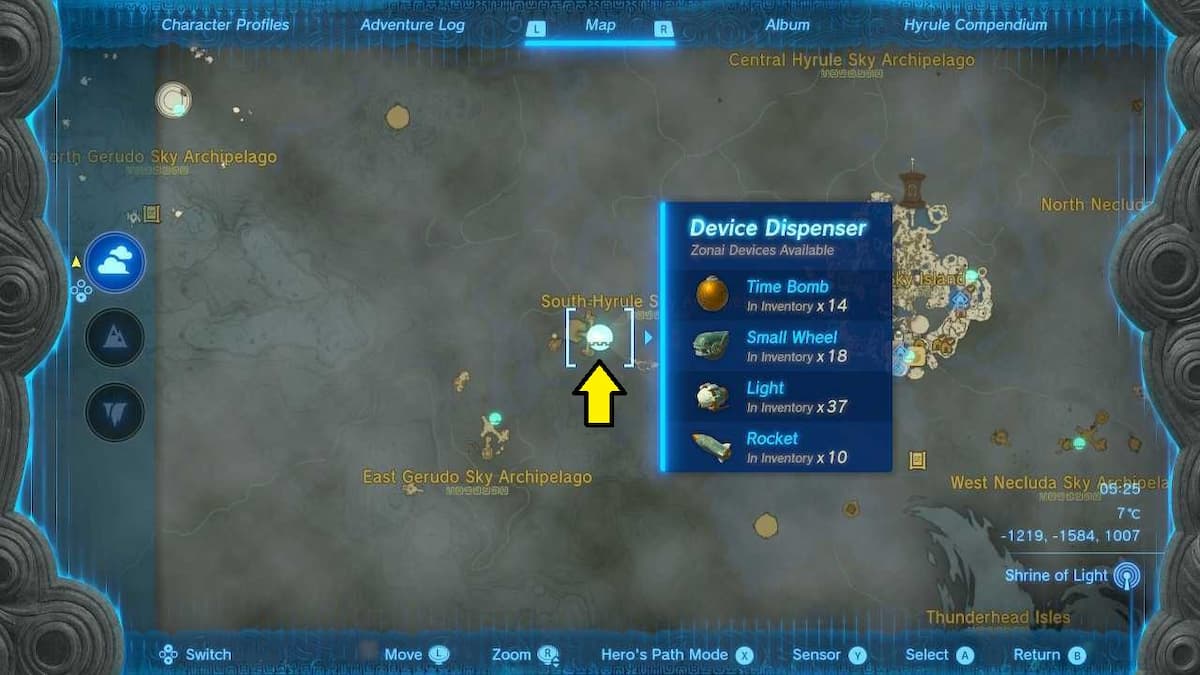
| Coordinates: -1219, -1584, 1007 -Time Bomb -Small Wheel -Light -Rocket |
 |
For more information on The Legend of Zelda, check out All Obsidian Frox Locations in TotK (Zelda Tears of the Kingdom) and Forge Construct Locations Map in TotK (Zelda Tears of the Kingdom) on Pro Game Guides.
[ad_2]