[ad_1]

Screenshot by Pro Game Guides
Much of Wartales sees your wandering the lands competing quests and looking for adventure in a war-torn medieval setting. You’ll build up your squad and pit your wits against your enemies in turn-based battles reminiscent of the XCOM series. But sometimes you’ll discover a dungeon to delve into and these can offer some slightly different challenges. One of the first is this tomb. If you’re having trouble with the Tiltren Tomb puzzle, we’re here to help with this Wartales walkthrough.
How to complete the Tiltren Tomb puzzle
Once deep inside the tomb, you’re going to come across a door you can’t get past. To move on you’ll need to have found three colored symbols that are dotted around different rooms in the tomb. The symbols themselves will be different each time, but once you have them you’ll be able to solve the puzzle and progress. You’ll find all three symbol locations below.
Related: Wartales Tips and Tricks for Beginners
How to find the Tiltren Tomb Puzzle in Wartales
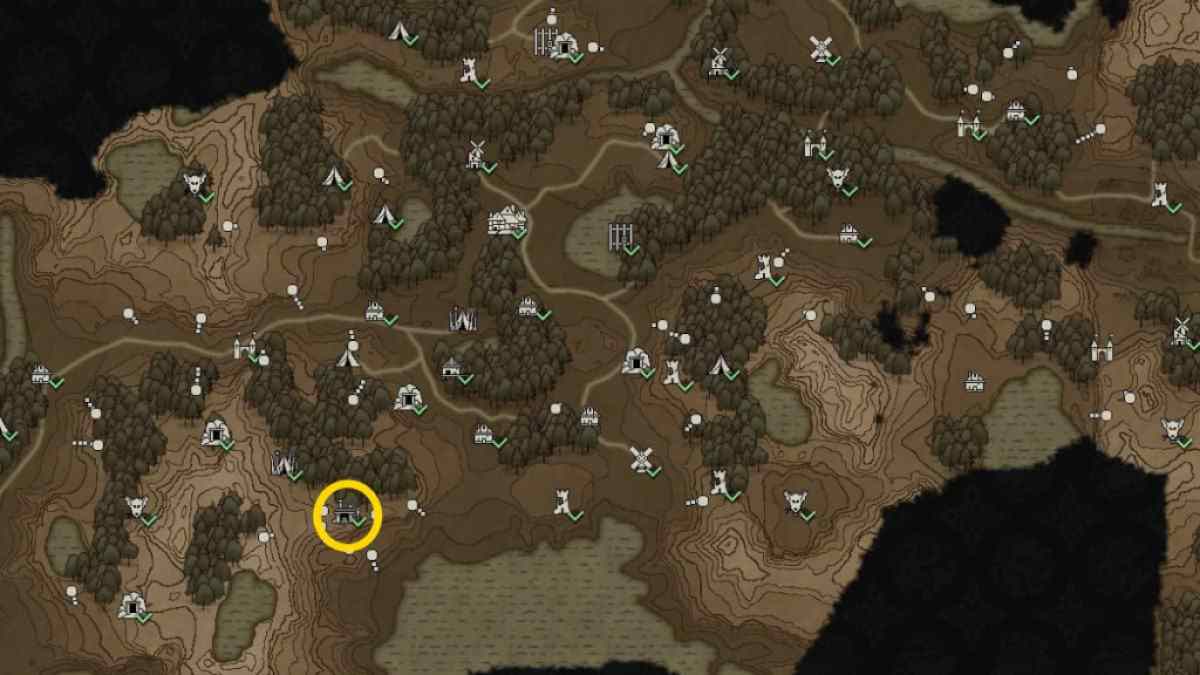
If you’re looking to go to Tiltren Tomb for the first time, you’ll find it southwest of Stromkapp. Follow the road that leads southwest from the town and then take the first left turn heading south. Go past Old Wilburt’s Fishery and the Pedra Mountain mine, then come off the road southwest and into the woods there. Tiltren Tomb is on the south side of those woods.
What you will need to solve the Tiltren Tomb puzzle
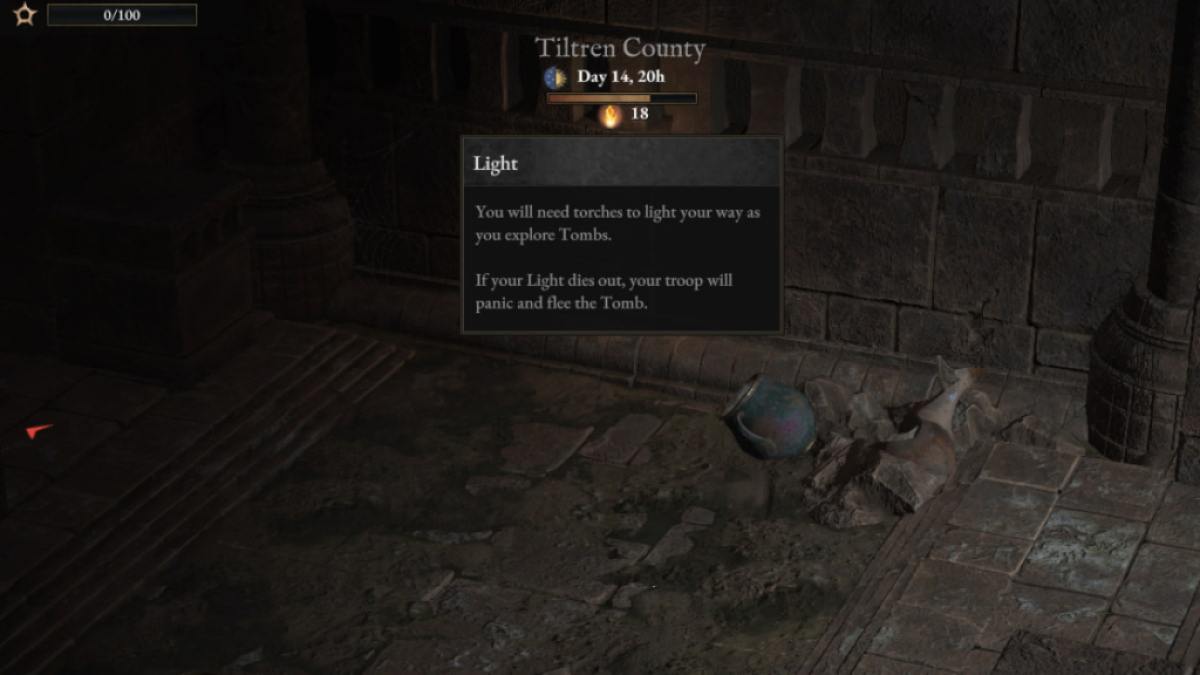
There’s an NPC, Serlham, outside the entrance. He can sell you torches that you’ll need inside if you can’t make them for yourself. We suggest taking six torches. You’ll need at least three torches to complete the movement parts of the Tiltren Tomb puzzle, plus a few extra ones to equip on Rangers (in their spare hand) to make battles inside much easier. Note that your Fatigue bar has a Light Meter underneath it while inside the tomb. If it runs out, you’ll flee back outside. However, you can camp inside the tomb, so if you have the correct materials, you can craft more torches as you need them.
You’ll have opportunities to take the Scholar and Bard professions during the run-through, but these are only required for optional content so it depends on your party size. You will need a Miner in the final room, and they’ll also come in handy at another point during the dungeon, but that is the only must-have (you can switch to the Miner profession with any of your companions when the time come if you don’t have one, so don’t panic). Finally, before you enter, equip torches to companions who have a free hand (usually Rangers). One per three or four companions should work fine.
How to find the first puzzle symbol in Tiltren Tomb
Move forward from the first room (there is only one exit, right) into a room with three exits: left, right, and forward. There’s a chest in the center of the room, but you won’t be able to open it until you’re on your way back out later.
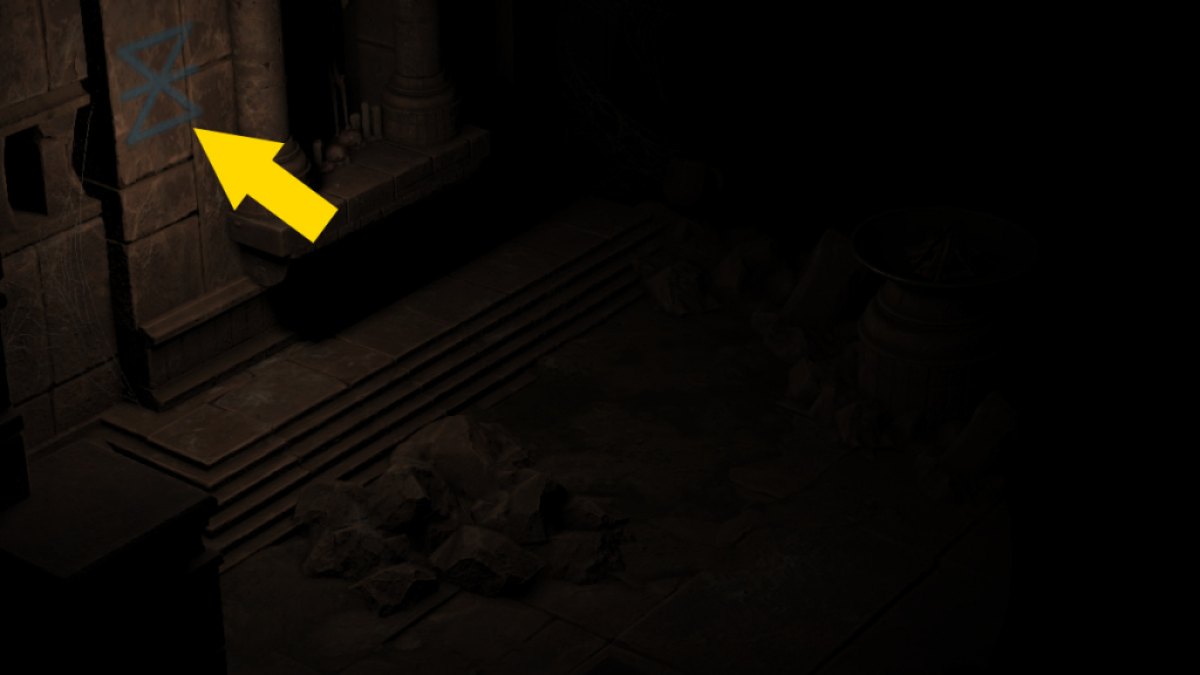
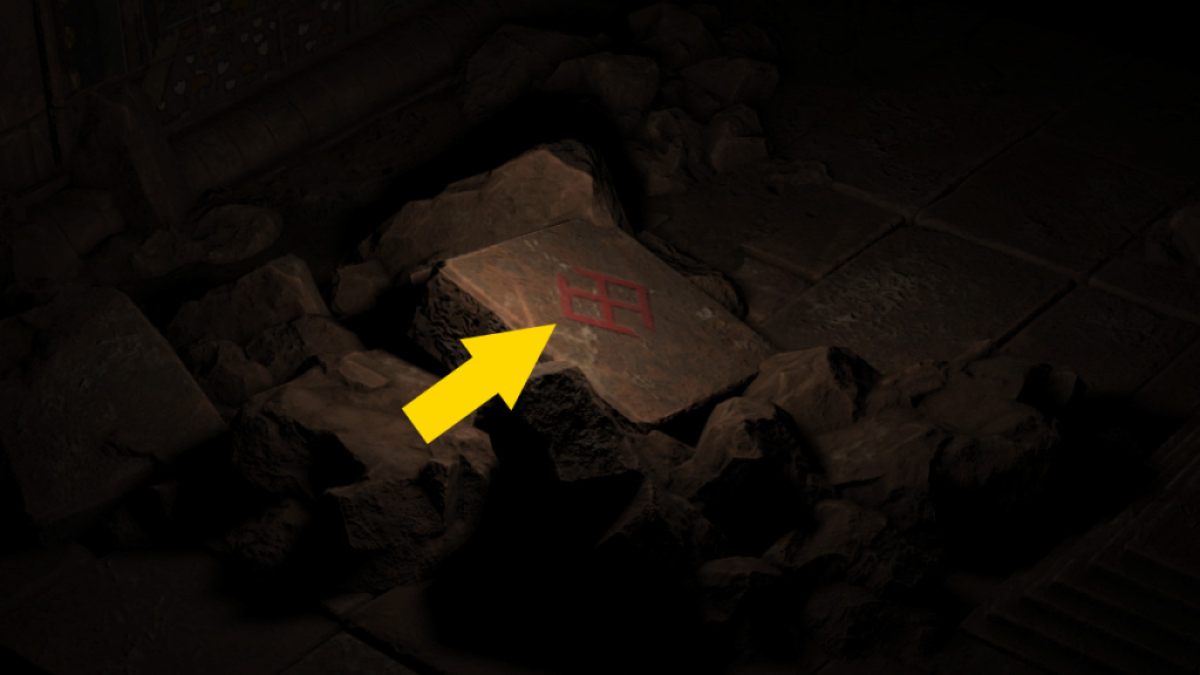
Explore the room to your right and shine the light in the top left of the room to see a Blue Symbol. This is the first of three symbols you’ll need to find to complete the Tiltren Tomb puzzle. Note it down, as this will be a different symbol each time you go to the Tomb on a playthrough.
Related: All Wartales Specializations, Explained
Optional content: The Bard challenge
There is also a statue in the room. If you inspect it, you’ll open up the Bard profession. If you assign one of your companions to be a Bard, it will begin a Rock Star-style mini-game. This can give some nice rewards, depending on how well you do, but it is not necessary for completing the puzzle and you can come back later and complete it anytime.
How to find the second puzzle symbol in Tiltren Tomb
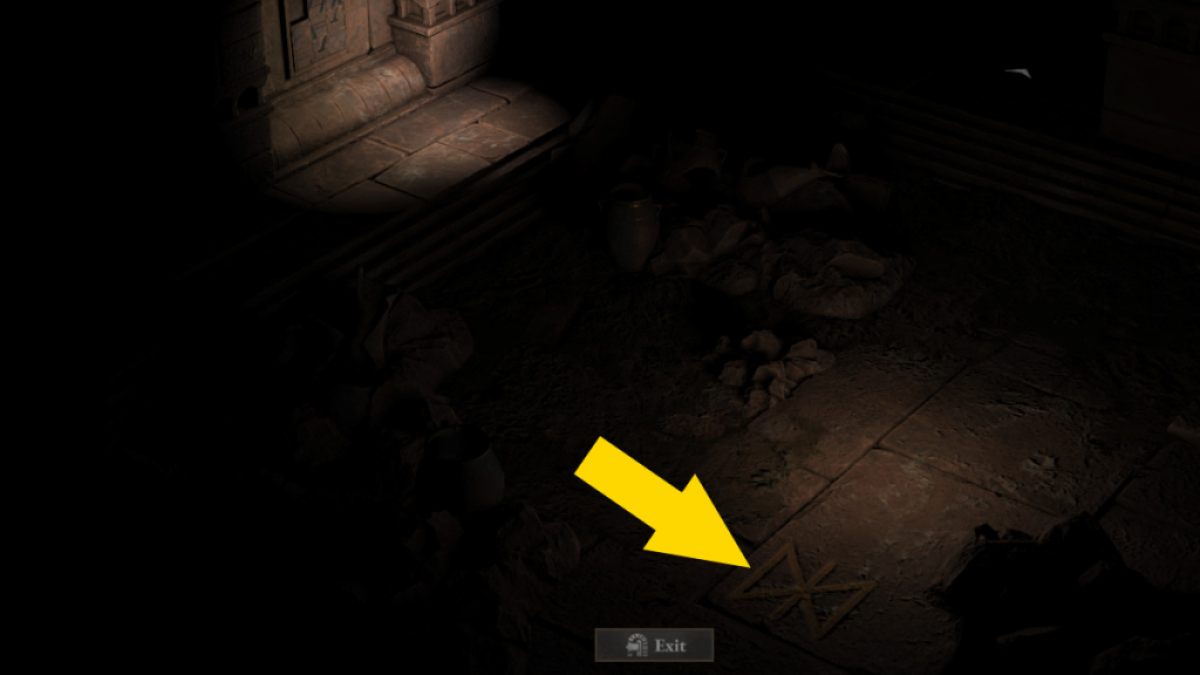
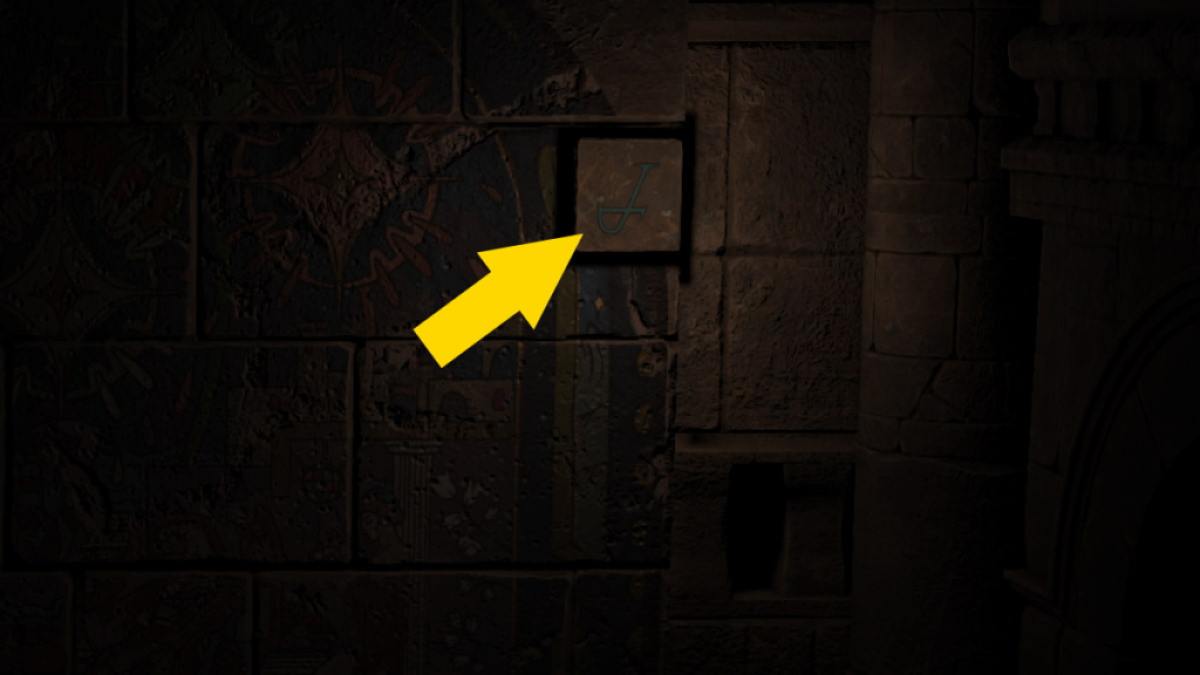
Move back to the central room, then go left by advancing cautiously (if you run, you’ll need to deal with an animal injury). Shine your light in the central foreground of the room to find a Yellow Symbol painted on the ground. Once again, make a note of it for later.
Optional content: The sliding puzzle challenge
You’ll find a puzzle on the wall. When you inspect it, you’ll need your Scholar to complete the sliding puzzle. Move the tiles to complete the Mountain pattern. The setup will be different for each player, so we can’t give you a solution. If you are struggling, you can come away from the puzzle to find an NPC that is ready to solve it for you, for a price. Once complete, you’ll be told you have discovered the Mountain Rune (this is for research, it’s not a physical item).
How to find the third puzzle symbol in Tiltren Tomb
Move back to the central room, then head forward down the final path. You’ll have a battle with Creepers and Mole-rats largely in the dark, which is where the equipped torches come in handy (you can equip them once the battle starts too, but only in turn order).
Related: Wartales Ghost Carcass Guide
If you don’t equip torches, your enemies will have the Brutality buff (+30 percent damage dealt) but while lit up, they’ll instead have the Fragility debuff (+30 percent damage taken) making things much easier. At the end of the battle, you’ll be able to shine your light around the room to reveal a Red symbol on a rock, which you once more need to note down.
Optional content: Examining the Mural
There is a large mural on the wall. If you inspect it, then shine your light in the top right corner, there is a rune jutting out. Hover your mouse over it and a green circle will appear. When the circle is complete, you’ll have researched the Rune of Performance.
How to complete the locked door puzzle
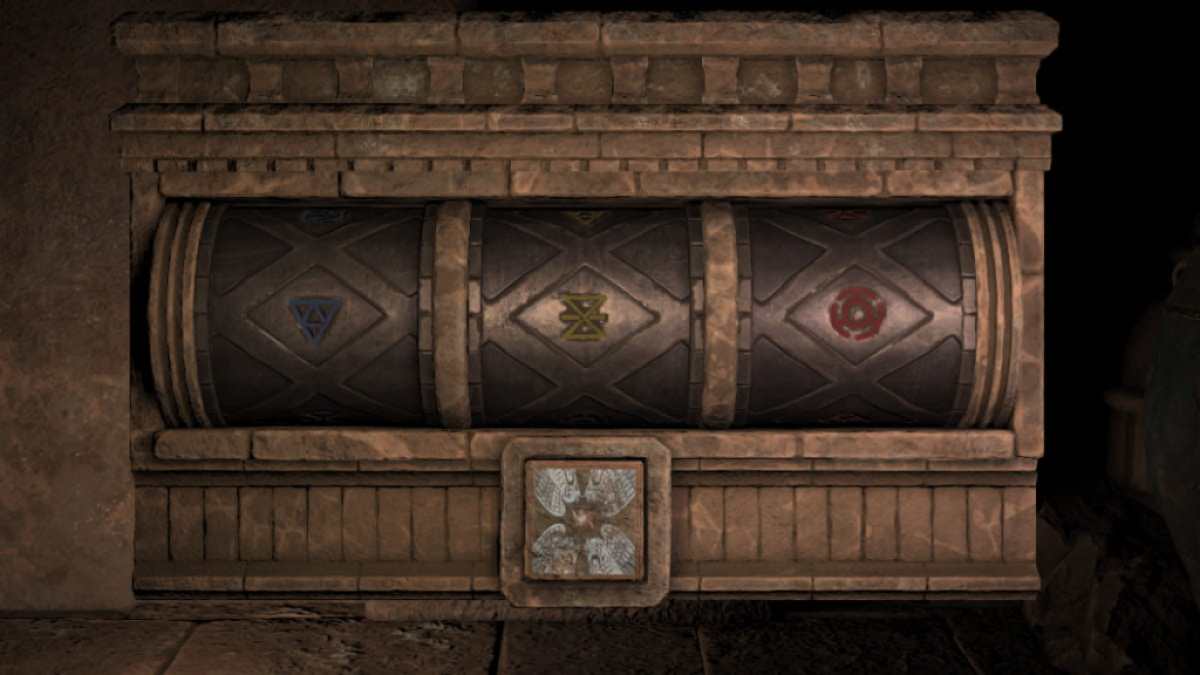
Leave the mural room by breaking through the tunnel to your right if you have a Miner, who will get some XP. If you sneak through, you’ll get injuries but no light loss (but you’ll need a Miner later anyway). In the next room, there is a lock mechanism to the right of a huge door. You’ll need your Scholar to solve the door puzzle. Input the colored symbols you’ve noted down into the lock mechanism to advance.
Optional content: The chest key and more
Search the corpse in the middle of the room to find as few Torches and a Crude Key (which opens the chest in the very first room on your way out). If you’ve made it this far, you’ll now be fine for light for the rest of the tomb. There’s an Urn on the right of the room with a few more items, plus a Locked Chest which you can lockpick.
The final room of the tomb
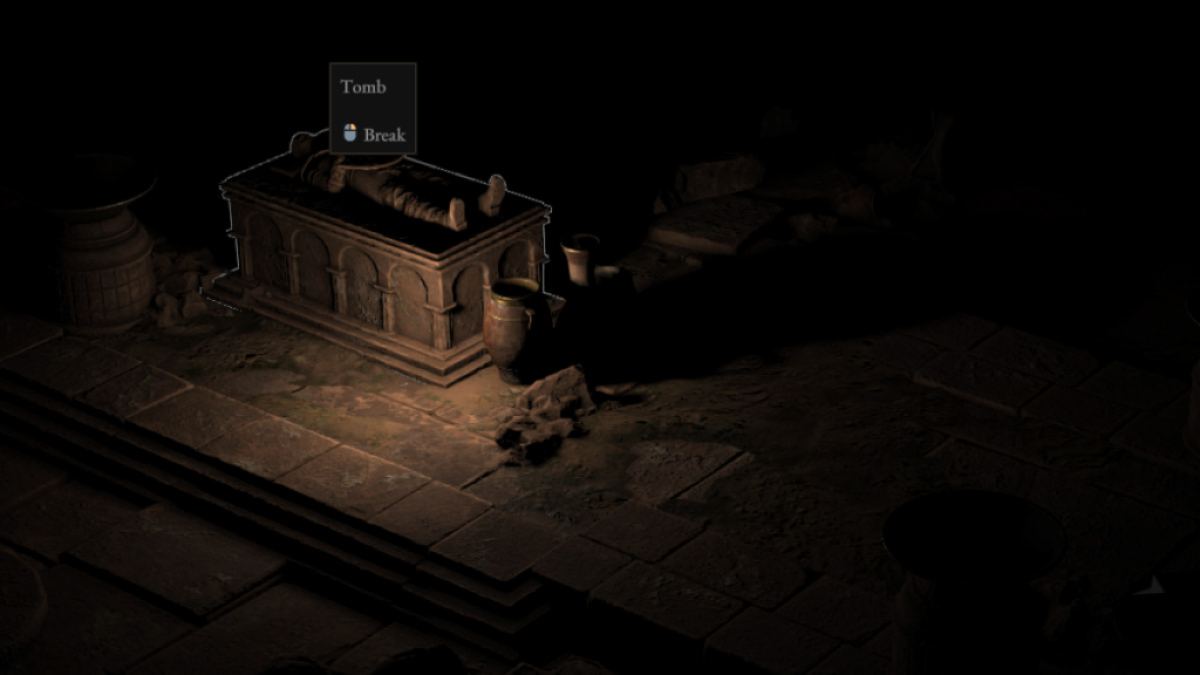
When you leave through the door you opened, you’ll face another Creeper battle very similar to the first. Once victorious, you’ll be in a room containing an ornate tomb. A Miner is required to open it up, after which you can loot the coffin to complete Tiltren Tomb. Make your way back through the rooms, and you’re done.
You can re-enter the tomb at any time to complete anything you do not do the first time. Movement will cost you one light per room visited, there will be no battles, but you can complete any optional content you didn’t complete the first time around.
We have plenty more on Wartales here at Pro Game Guides, including Wartales Oils Guide – All Oils and How They Work and How to capture Prisoners & Animals in Wartales.
[ad_2]