[ad_1]
Screenshot by Pro Game Guides
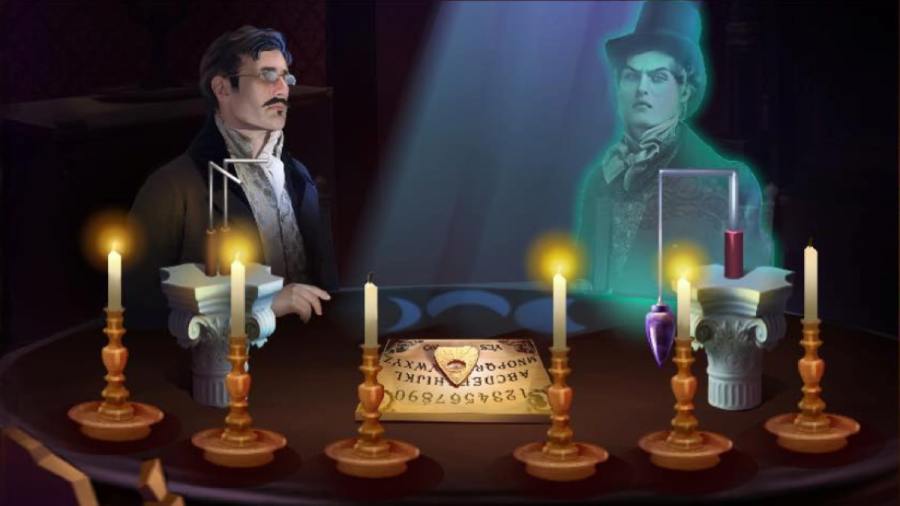
This is part two of our walkthrough guide to the Adventure Escape Mysteries game, Haunted Hunt. At the end of Chapter 1, Moira has escaped her cell and used Raven’s form to break herself out of the room she was in. Still trapped in the house, she stumbles upon some séance equipment. Perhaps she can summon a ghost to help her escape in our Haunted Hunt Chapter 2 walkthrough.
Haunted Hunt Chapter 2 Walkthrough
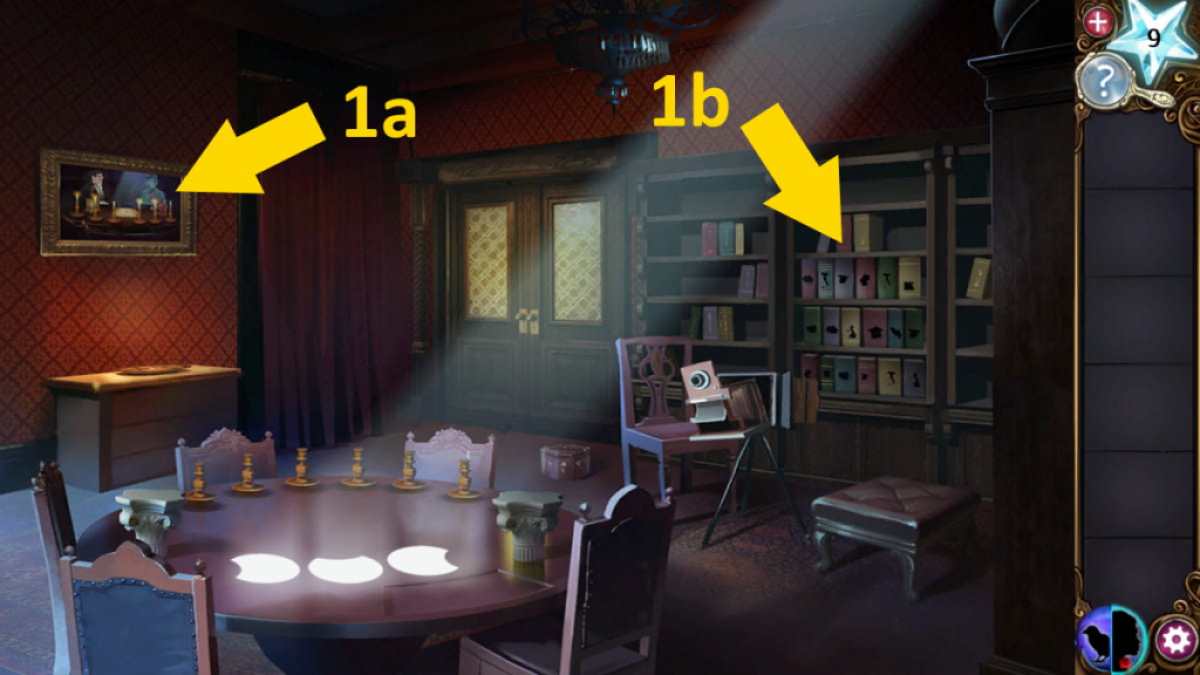
In human form, look at the painting on the wall (1a) which shows the steps for summoning a ghost. Note there are six candles, four of which are lit. Also note the objects on the plinths, the Ouija Board and planchette, plus the reflections of the moon on the table.
Related: Echo Bay Murders – Chapter 1 Walkthrough
How to enter the secret room
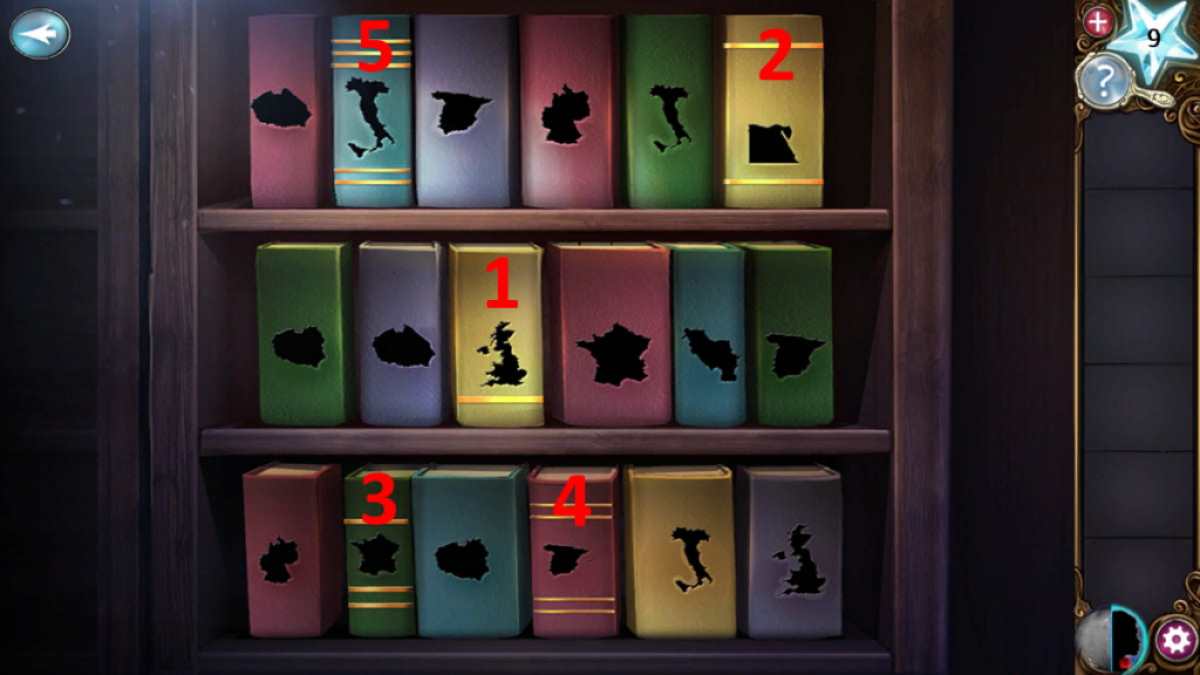
Now get a close-up of the bookshelf (1b). You’ll note that five of the books have stripes on them:
- 1 stripe: UK
- 2 stripes: Egypt
- 3 stripes: France
- 4 stripes: Spain
- 5 stripes: Italy

Go into Raven form and pick up the Planchette Half (2a) and Candle (2b). Click the painting (2c) to move it aside and take a second Candle from inside. Click each of the window shutters (2d) until they recreate the pattern of moonlight on the table as it is in the photo (see below). Then select the Globe (2e) for a close-up. Click the five countries in the order above, which will open the bookcase and reveal a secret room.

Now back in human form, click the new entrance to go into the secret room. Go straight back to Raven form and take your third Candle (3a), the second half of the Planchette (3b), and the Dowsing Rod (3c). Then click the clothes (3d), which moves them to reveal a fourth Candle (4a).
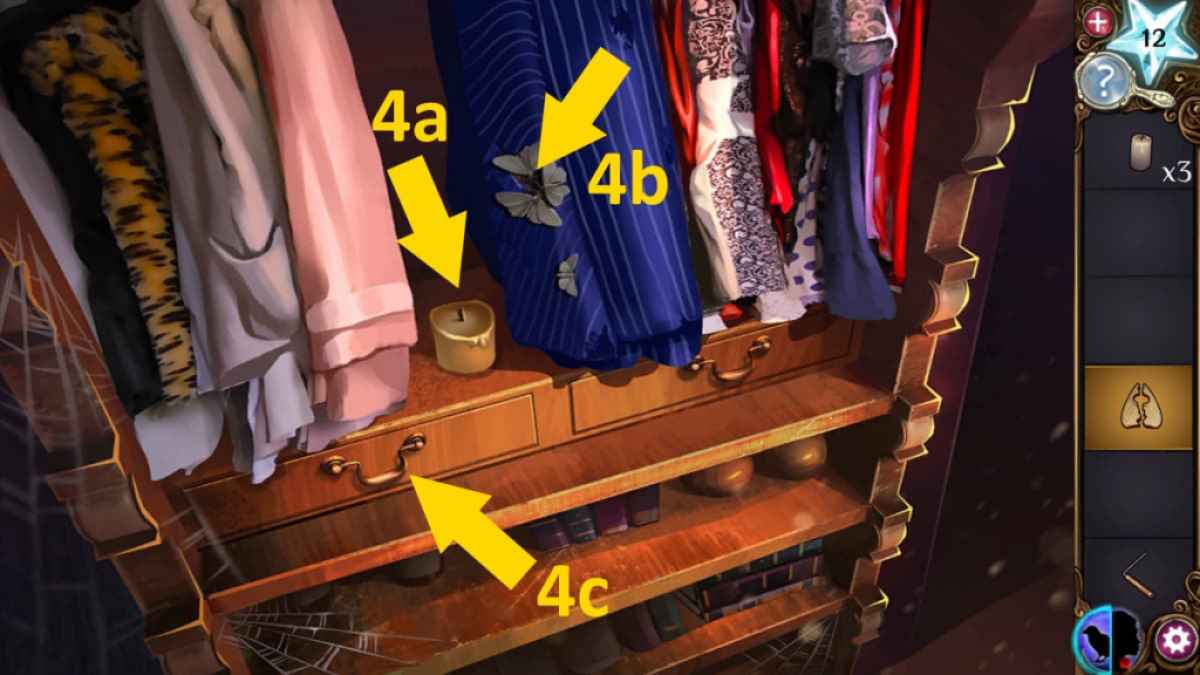
Click the moths on the pocket of the blue jacket (4b) to reveal a Broken Pocket Watch, with its one remaining hand pointing to 43. Also, open the left drawer to get a fifth Candle (4c).
How to use the Ouija Board
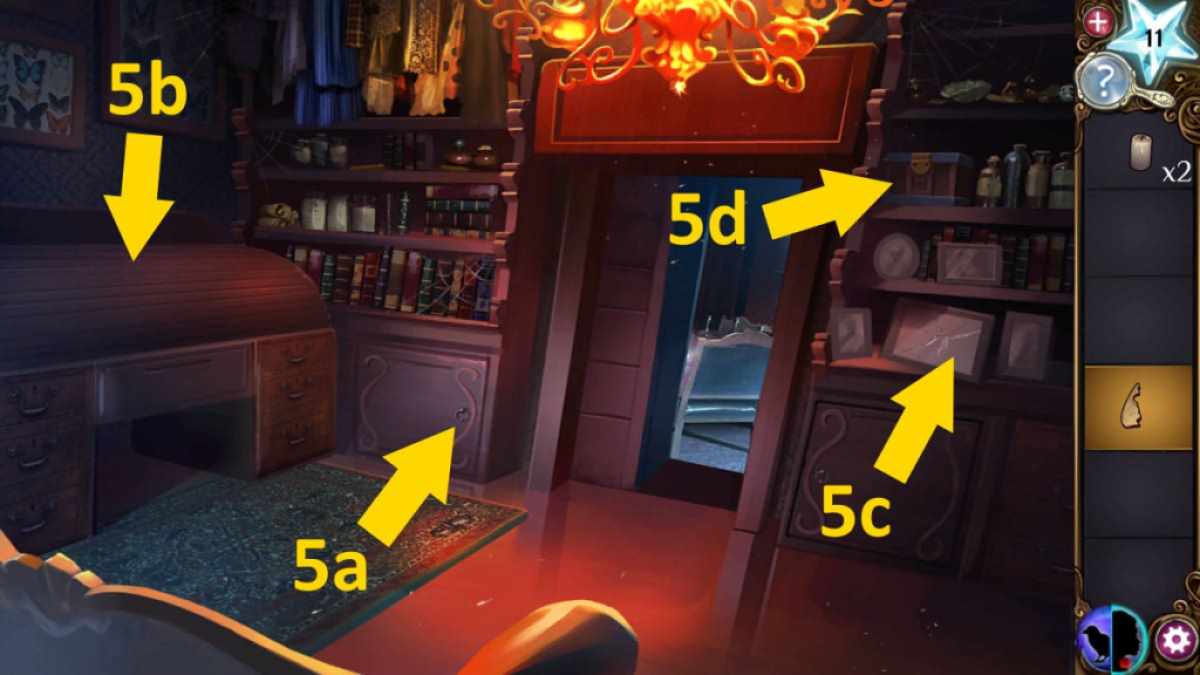
As a human, open the bottom left cupboard (5a) to get a sixth Candle, then open the top of the desk and take the Ouija Board (5b). Click the broken picture frame (5c) to get a Glass Pane, then open the box (5d) and get the Pendulum from inside.
Related: On Thin Ice – Full Walkthrough & Solutions (Chapters 1-4)
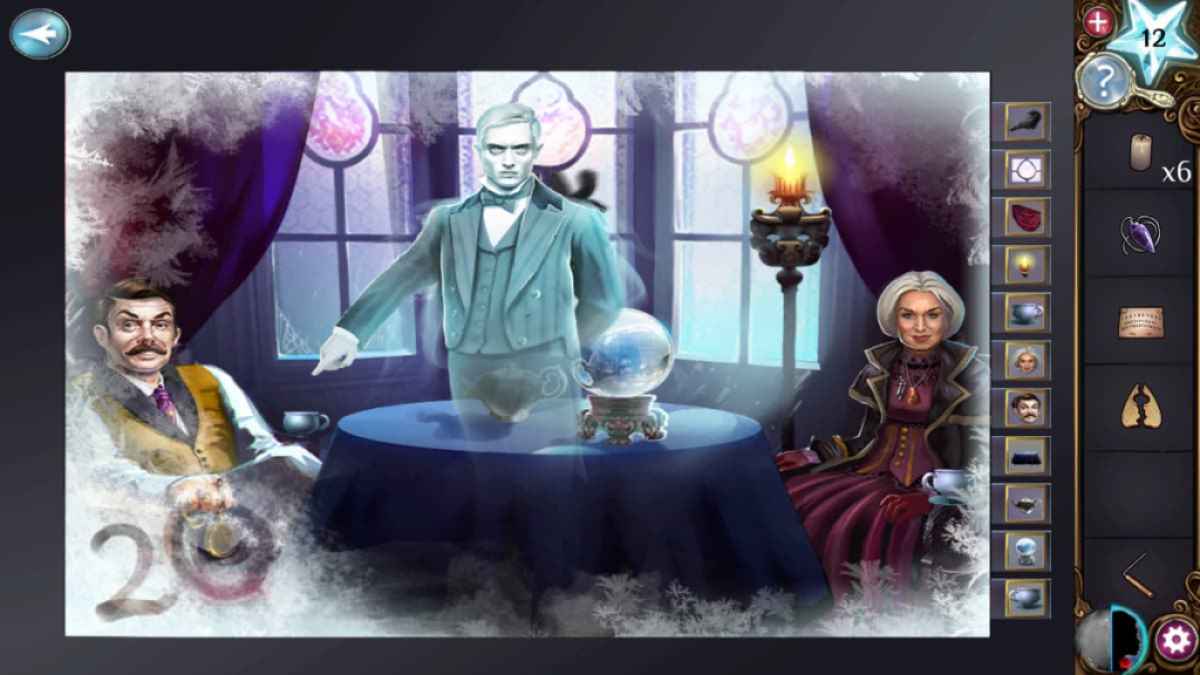
Back in the first room, add the glass pane to the Camera to fix it, then click it again to reveal a blurry captured image you need to bring into focus. You do this by moving the tabs on the right into the correct positions (see the image above if you’re struggling, as it can be quite tricky). Once you do, a ghost appears pointing to the number 20 in the bottom left of the photo.
When you come back out of the photo, a second Dowsing Rod will fall from the camera, so pick it from the floor under the camera. You can add the six candles to the candlesticks, put the Ouija Board on the table, and place the two dowsing rods on the right pedestal. You can then place the two Planchette halves onto the board and add the pendulum to the left pedestal.
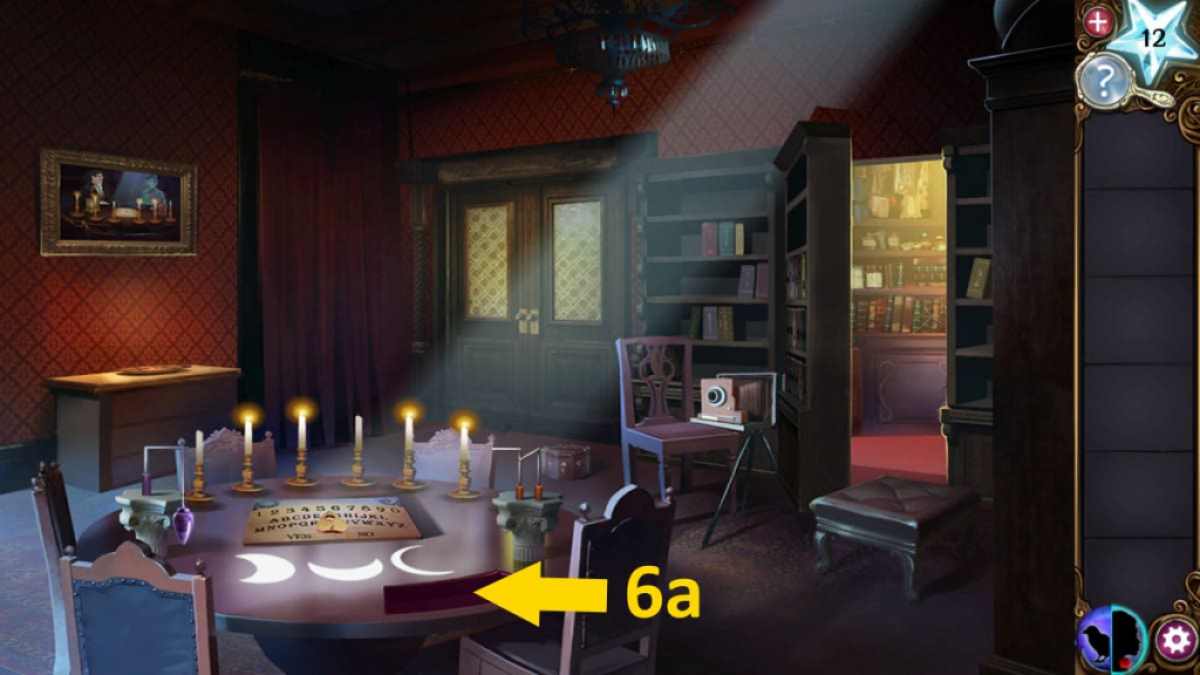
Once done, a compartment opens (6a) to reveal a Tinder Box in a secret compartment. Take it and use it to light (from left) the first, second, fifth, and sixth candles. If you’ve correctly opened the shutters in Raven form, you’ll get a cut scene because the board is ready to use!
How to escape the room
Click on the board and you’ll be asked for the ghost’s time of death. Move the Planchette to 2, then 0, then 4, then 3, and Baxter will appear. He’ll ask you to move the box by the door, but a trap is triggered before you get a chance. Return to Raven form and fly up through a gap that has appeared in the hole behind where you moved the picture (2c). This begins a pipe connection puzzle.
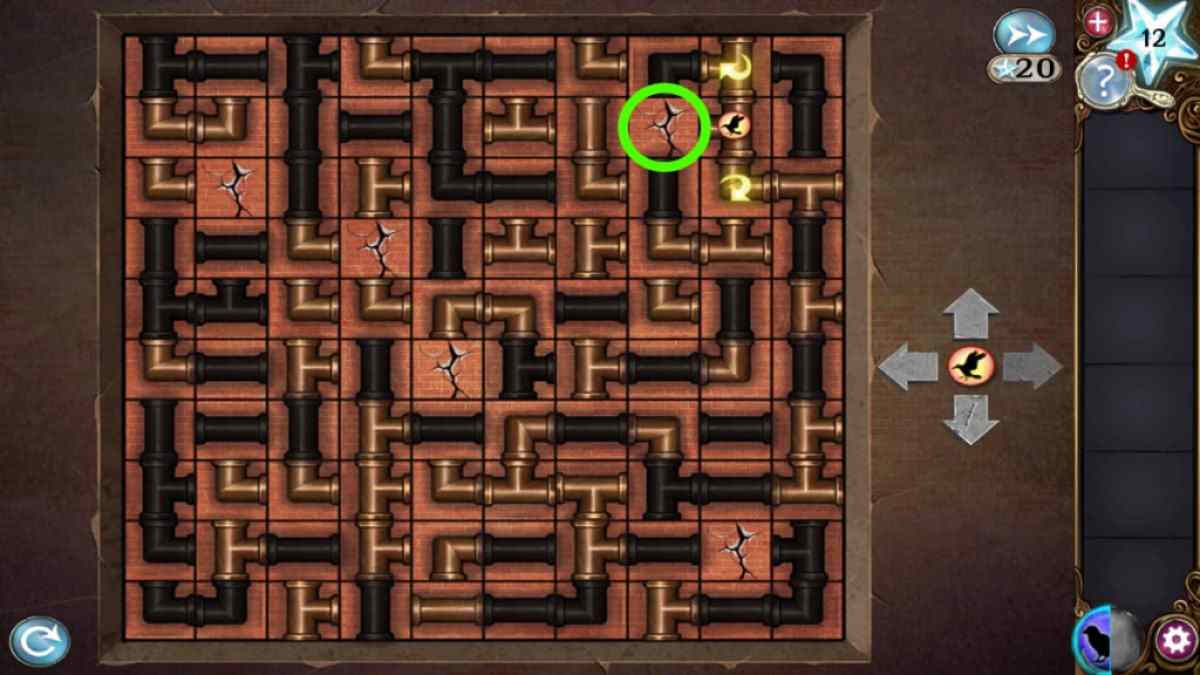
The exit you need is marked in the image above. Switch the pipes as you move to follow this path, move onto the crack, and you’ll have completed Chapter 2 of the Haunted Hunt.
Looking for the Solution for the next section? You can find the Haunted Hunt Walkthrough, Chapter 3 – Adventure Escape Mysteries right here at Pro Game Guides!
[ad_2]